Carolina Red June Apple Tree Plants

Carolina Red June (Malus domestica “Carolina Red June”) is an old apple variety that is thought to have originated in Tennessee in the early 1800s. The apple was called by a host of other names over the years, such as Jones Early Harvest, Sheepnose Crab, Blush June Red, and Red Juneating. The tree is valuable because of its full-flavored, early ripening fruits.
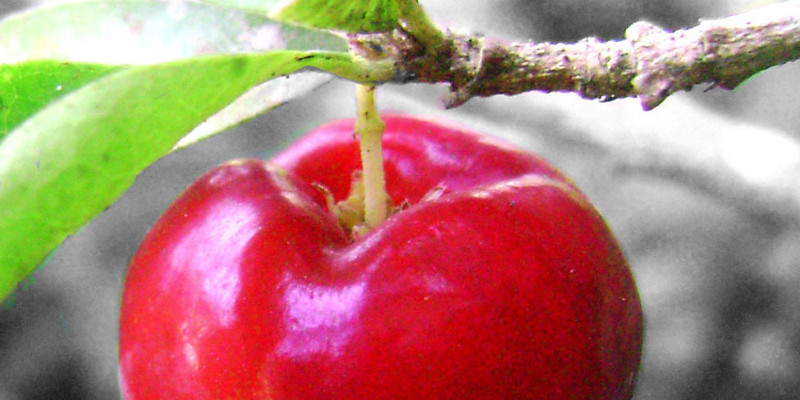
Fruits

Carolina Red June produces smaller than ordinary fruits which may be round, somewhat oblong or conical. Fruits boast a dark red skin and fine-grained white flesh which may stain with red following skin is broken. Unusual for early ripening fruit, the fruit from this Carolina Red June includes a crisp, complex flavor that tastes best when eaten fresh off the tree. The fruit has been popular for apple pies and cider.

Yield

Carolina Red June apple tree ripens early in the season, generally in late June or early July. Fruits are highly productive when cared for properly. Unlike most other apple trees, the Carolina Red June produces a second, smaller stack of apples in the fall. The apples are honest keepers which do not last particularly long in the fridge. If you want to store the apples, then keep them in a crisper drawer away from vegetables.
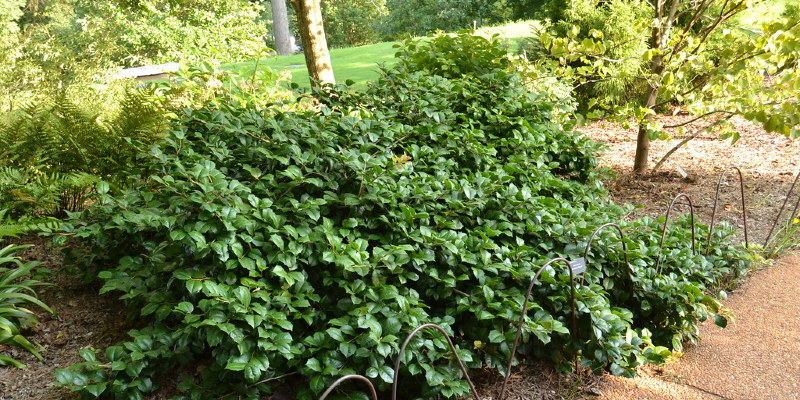
Care

Apple trees do best in a sunny area with well-draining dirt that is set well away from buildings, tall trees and other structures which cast shade. To get a harvest of high-quality apples, then pick some apples off the tree to permit the rest of the fruit lots of room to grow. There should be between 4 to 6 inches between every fruit. This not only guarantees better-quality fruit, but a possible drop in disease and pest attacks.

Issues

Carolina Red June is very susceptible to apple scab and rust. Apple scab causes lesions on leaves and fruits which eventually turn into corky growths. When heavily infected, the tree may drop its apples prematurely. Rust causes bright orange lesions on leaves and young fruits. Both diseases are brought on by fungus and may be treated by regular applications of fungicide. Pruning dead and diseased branches in the tree will help prevent fungal diseases, as this allows air to circulate better and dry the wet, fungus-attracting leaf.

See related

The way to Make Faux Bois Planters

Faux bois means “false wood.” Cement-based planters created to look like wood generally last much more than the real thing and will weather to look pleasantly rustic. They can be constructed from concrete or hypertufa, which has a more porous, sandstone-like texture. You can find recipes for many concrete or hypertufa combinations online. Select one which seems most suitable for the size of planter you wish to create, selecting stronger mixes for larger containers.

Find a container the size and shape you would like your planter to be. Put it inside a garbage bag. Smooth the bag so that it clings to the container and turn the container upside down on a tough surface.

Don heavy rubber gloves, a dust mask and goggles. Combine portland cement, masonry sand and fibermesh with water to make a concrete mixture. Instead, mix portland cement using peat and perlite, in addition to fibermesh and water, to earn a hypertufa mixture. Expand the ingredients in a wheelbarrow, plastic tub or plastic sink, adding water in tiny amounts until the mixture reaches the consistency of stiff frosting.

Implement your mixture to the plastic-covered container, using a trowel, to a depth of 1 or 2 inches. Produce flux in the mixture with your gloved fingers or the trowel to get a hardy tree-bark look. Leave a few raised places to represent knots or broken-off branches.

Cover the planter with moist burlap or plastic, allow it to sit for 12 to 36 hours, until it appears firm enough to get finer carving. Add more textures and lines as desired, using a table fork, roofing knife or nail. Use a piece of log or a picture as a guide, if necessary.

Maintain the planter covered with moist burlap or plastic for three more days. Turn it right side up and eliminate the plastic-covered container. File off rough edges using a wire brush.

Leave the planter to cure from the shade for several weeks. Fill it up with water and allow the water drain out gradually through the lines that are stale. Keep filling the planter with water for a couple weeks to allow lime to leach out, before placing any dirt and plants in it.

See related

The way to Make the Best Looking Hypertufa Garden Containers

Hypertufa, made from cement and peat moss, supplies the stuff for making a durable, long-lasting planting container. These pots have a rustic appearance that may match your landscape whether you plant them with foliage or flowering plants. Attention to detail during the molding and curing process ends in the best looking hypertufa container since it allows you to avoid unwanted roughness on the last outside of the pot. The finished pot has a similar shape to this mold. Use old vinyl planters or cardboard boxes in the desired shape to mold your hypertufa.

Establish your mold upside down to a plastic bag or bag. Cover the mold with a trash bag, smoothing out the wrinkles as best as you can. Any wrinkles still present appear inside the pot so they don’t impact the final appearance of the container.

Put on a set of rubber gloves and mix two parts peat moss, 1 part Portland cement, and 1 part sand or perlite in a huge bucket. Mix in a handful of concrete reinforcing fiber with these dry ingredients.

Mix in 1 part water slowly, combining it with all the dry ingredients together with your hands. Add water until the mixture is completely moistened but still stiff enough to hold its shape when squeezed. The mixture contains enough water when only a thin film of moisture is visible once you squeeze a couple of.

Cover the sides of the mold with a 2-inch-thick layer of this hypertufa mixture. Pack it solidly against the mold so it holds together. Place a two- to 3-inch depth on the cover of the mold, which will be the bottom of the finished container. Flatten it with your hands.

Smooth the sides of this hypertufa to your best-looking container after it dries. Any irregularities will harden and become permanent. Poke a hole in the middle of the bottom with your finger to offer drainage.

Place a plastic bag on the cap of the container and totally cover the hypertufa mixture. Allow it to cure for a single week in temperatures over 50 degrees Fahrenheit, or for two weeks in cooler temperatures. Remove the bag and mist the hypertufa once daily with water. Moisture helps the mixture cure correctly.

Remove the plastic bag and turn the container over quietly. Lift the mold from this container. Rub any sharp edges with a stiff brush to smooth them.

Manage the finished container for the next two weeks. Spray the container a couple of times each day with water for the next five days after the recovery period is finished. Spraying leaches out the alkalinity therefore it won’t hurt the plants you grow in the pot.

See related

Arborvitae Tree Identification

Arborvitae (Thuja occidentalis) are coniferous evergreen trees in the cypress family. The leaves and bark are high in vitamin C, and the title “arborvitae” means “tree of life” in Latin. The tree is indigenous to North America and is cold hardy to U.S. Department of Agriculture plant hardiness zone 3. There are several characteristics of the arborvitae, also called white cedar, that differentiate it from other conifers.

Size and Shape

Arborvitae are narrow, pyramid-shaped trees which come to a stage on top. They climb about 30 feet tall and 10 feet wide from the home landscape, using a few arborvitae in their natural atmosphere growing up to 60 feet tall. The branches are covered with foliage from the top of the tree into the bottom branches which could grow all of the way to ground level, unless they have been damaged, painted by deer or other insects, or planted where the base of the tree is scaly.

Foliage

The foliage of the arborvitae grows in flat sprays using miniature scale-like leaves, unlike the outward-growing needles of a number of different conifers. The newly forming leaves are feathery, and they obtain their scale-like look as they age. Foliage is green, sometimes turning yellow during winter months, and the person leaves are far less than 1/8 inch wide. Leaves are arranged along branchlets that develop in flat sprays from the principal branches. When crushed, the leaves emit a distinct odor.

Bark and Cones

The bark of the arborvitae is gray, turning a reddish color as it ages. Furrows from the gray bark show that the reddish color that will eventually be more widespread. The tree creates male and female cones which are just 1/2 inch extended. The cones form at the tips of branches and grow in an upward direction. They start out green and turn brown as they mature. Unlike the open cones of pines, arborvitae cones look like miniature scale-covered eggs.

Location and Pests

In the home landscape, arborvitae are frequently seen growing in rows of closely-planted trees to form privacy screens, windbreaks or boundaries. Small groups of two to five trees are sometimes planted together as an accent in the lawn. In the wild that the trees are generally found growing in wet, low-lying areas. The trees need full sunlight, therefore arborvitae growing in shady areas will likely look scraggly and feeble. A pest commonly associated with arborvitaes is that the bagworm. Bagworm presence is indicated by the hanging pods they produce which may be mistaken for cones, except the forks hang from the branches while the cones grow upward.

See related

Landscaping With Hostas

There are around 2,500 cultivars of hostas (Hosta spp.) Available on the marketplace. This huge category of plants is wildly popular among gardeners. Their preference for shade makes those plants a good selection for filling semi-shady spots in the landscape. Hostas feature unusually complete, broad leaves that convey a feeling of near-tropical lushness at U.S. Department of Agriculture zones 4 through 8.

Appearance

Hostas are primarily known for their complete leaves that come in blue, green, gold and white, depending on the variety. These leaves are what attract many home gardeners to hostas, but hostas also create flower stalks. Hosta flowers are trumpet shaped and small, and somewhat diminutive when compared with the large, striking leaves. You might find these flowers are an extra bonus on your landscape, however, since you opt for the wide range of hosta you would like to grow, foliage is going to be a larger consideration. Hosta’s foliage makes this plant a superb specimen for filling empty garden spaces between shrubs and flowering plants.

Location

Hostas are known as shade tolerant plants, however, some varieties of hostas are more shade tolerant than many others. Hostas with white or gold leaves need a little morning sun with afternoon shade. Blue- and also green-leaved hostas will thrive in deeper colour, with less sun. Landscaping with hostas means selecting the right place for your chosen variety with the necessary lighting conditions.

Soil

Provide the right sort of soil conditions for successful hosta development. Hostas thrive in soils that are somewhat acidic and rich with organic matter. You can test the pH of the ground having a kit purchased from a nursery or garden center. If your soil is acidic, compost is a suitable amendment for your soil. If your land is somewhat alkaline, peat moss can be added to lessen the soil pH.

Companion Plants

Deciding on the best companion plants for your hostas will enhance your landscape. Flowering plants will add cosmetic beauty to your landscape, while matching nicely with hosta leaf. Bulb flowers like tulips (Tulipa spp.) , hardy in USDA zones 4 through 10, will blossom in the early spring and fall following blooming. Hostas is used to hide these flowers during their fall. This can work with other perennial bulb, corm and rhizome blossoms like irises (Iris spp.) , hardy in USDA zones 3 through 10, and amaryllis (Hippeastrum x hybridum), hardy in USDA zones 8 through 10. Additionally, hostas pair well with non-flowering plants like ferns, because the differences in texture between the two plants provide visual interest in the landscape.

Care

Proper care will keep your hostas looking good on your landscape for several years. Although easy to take care of, hostas typically cannot survive without supplemental water. Hostas need at least 1 inch of water each week. Establishing a regular watering program when natural rainfall doesn’t fulfill these needs will stop hostas from drying out. Water your hostas first in the morning or in the evening to allow your hosta to consume as much water as you can without competing with the sun’s evaporation. You can fertilize your hosta plants in the spring, late spring and center summer using a balanced 10-10-10 fertilizer.

See related

Low-Volume Drip Irrigation Landscaping

Drip irrigation delivers water directly to the ground rather than spraying water over plants like a sprinkler. As a result, it consumes less water than traditional irrigation systems. Many homeowners looking to use low levels of water pick drip irrigation for financial or environmental reasons. In addition, it makes mowing and landscaping simpler on slopes, and trickle systems can have aesthetic advantages.

System Basics and Benefits

Drip irrigation provides plants equally as much water as they require for each day, so that it reduces water waste. Easy drip irrigation systems contain perforated hoses in addition to the ground, while more complex system are installed underground. Since water is delivered directly to the ground, less of it is lost to evaporation. Drip irrigation requires very little physical effort because the gardener does not need to carry around a hose or watering can. Professional installers usually install elaborate systems, which contain pumps, hoses, filters, water meters, valves, drains and other parts. Many fungal diseases influence plants the most when plants have moist foliage, and drip irrigation reduces issues with respiratory diseases using water directly to the plant roots and dirt, without wetting the leaves.

Design Factors

Before installing low-volume drip irrigation, the gardener must carefully get to understand the landscape. Various areas of the landscape may require different levels of drip irrigation, based on factors like amount of sunlight, types of plants in each area, soil type and topography. The sunnier a place, the more water it will require. Water might often leak downward in pool in the lowest parts of the landscape, causing them to require less irrigation than higher parts of the lawn. It’s a good idea to take into account the layout of the plants and land, and then design the irrigation system to implement water where it is needed most.

Landscape Considerations

Low-volume drip irrigation is acceptable for sloped gardens because the slow rate of water application minimizes runoff across the landscape. Underground systems are especially good at reducing runoff, and in addition, they lose less water to evaporation. Drip irrigation also makes landscaping with different types of plants simpler because drip system valves can distribute different levels of water to crops with different water requirements. For example, 1 valve can distribute more water to your moisture-loving tree, while the other valve ensures that less water reaches an area of the garden containing succulents.

Choosing Plants

When designing a low-volume drip irrigation landscape, it is best to pick plants that don’t require a lot of water or constantly wet roots. Many plants and grasses native to bogs or wet areas won’t do well with low-volume irrigation. Cacti, succulents, California juniper or other desert trees and shrubs will do better using a little bit of water. In addition, it makes sense to think about plant root depth. Plants with shallow roots might be able to get sufficient water from low-volume perforated hoses in addition to the dirt, but plants with deep roots will probably require underground drip irrigation to get sufficient moisture.

Reducing Water Volume

Well-drained soils typically require more irrigation than compacted clay soils. 1 way to make sure that low-volume drip irrigation will provide enough moisture to plants is to add compost or other organic matter to the ground to help it hold moisture. Plants will also require less water once the irrigation system is located directly by their origins. The more directly water is applied to plant roots, the less probable it is that the water will disappear or be consumed by weeds. Therefore, it is helpful to research the depth of the origins of different sorts of plants and then place underground drip irrigation accordingly.

See related

The way to Eliminate Haze From Tile Floor After Utilizing Mop & Glo

Mop & Glo Multi-Purpose Floor Cleaner is intended to clean and polish your tile in one measure. But, after a couple of uses, the product’s polishing chemicals build up, leaving behind a haze. Depending on the number of coats are on your ground, you might have to clean it with white distilled vinegar or vinegar. When you have stone tile floors, contact the tile manufacturer for cleaning directions to eliminate Mop & Glo’s haze; ammonia and vinegar might damage your floors.

Minor Build-Up

When you get the issue quickly, undiluted white vinegar dissolves the haze without damaging the floors or exposing one to toxic fumes. Mop the floors with direct vinegar and let the cleaner sit for 10 minutes before rinsing with water. If needed, repeat the process one more time to eliminate all of the haze.

Thick, Stubborn Haze

When you have utilized Mop & Glo for your weekly mopping for some time, ammonia is the only choice to get rid of the accumulation. Open the doors and windows in the area you’re cleaning, and dilute 1 cup of ammonia in 8 cups of warm water. Apply the product into the ground with a mop, wait 10 minutes, and rinse with clean water.

See related

How to Clean Mold from Plastic Shower Walls

The bacteria and mould which love the heat and heat of your shower stall can display virtually all of the colours of the rainbow, but in case you’ve got a psychedelic experience whenever you shower, you’re not cleaning often enough. Despite the near certainty that it will rise — given moment and humidity — mold isn’t that difficult to control, particularly in a bathtub which has plastic walls. A straightforward weekly remedy are able to keep your bathtub mold-free.

The Colors of Mold

The scariest mold is black, which is the color of approximately 50 species of Stachybortrys, the very poisonous mold you’re likely to find in your house. Black mold prefers to be behind the walls, however, because it feeds cellulose and requires a constant moisture distribution — not only large humidity. The mold on your shower walls may also be green, brown or any shade of red. It may even be white. The pink mold which you may see is not a fungus — it’s a type of airborne bacteria — but it may cause the same respiratory problems as true mold.

Killing Mold on Shower Walls

However much mold has exploded on your plastic shower walls, then it should not take more than 30 minutes of your time to eliminate it. You can kill it using a commercial toilet disinfectant, but normal household bleach is just as powerful. Mix a solution of 1 part bleach and 4 parts water and use it to spray the walls down. Give the bleach about 10 minutes to work; then scrub the walls down with a mild soap solution, such as an ounce of dishwashing detergent per gallon of water, and then rub. If you have a negative reaction to bleach, then disinfect with full-strength white vinegar instead.

Deep Cleaning

The mold will grow back if you don’t kill all of it, including the colonies that collect around the tap handle and shower mind and at the caulking around the borders of this stall. Spray these areas liberally with your mold-killing alternative; then scrub from the crevices and corners using a toothbrush. Despite your best efforts, you may not be able to receive all of the mold out of silicone caulking, and if you can’t, it’s ideal to re-caulk. That means removing all of the affected caulk, and also the simplest means to do it would be to cut it off with a knife; then, pull it off. Once it’s gone, disinfect the combined thoroughly before applying fresh material.

Mold Prevention

Keeping mold at bay is as straightforward as maintaining your bathtub walls dry when you aren’t showering and disinfecting them regularly. If you’ve got an exhaust fan in the bathroom, then make sure it’s running as you shower and for 20 to 30 minutes afterwards. If your toilet does not have a lover, keep air circulating with an open window. Set a spray bottle of white vinegar in an obvious place in the bathroom so you’ll remember to use it. Spraying the walls, followed by a thorough wiping and rinsing should ensure a mold-free encounter for anyone working with the bathtub.

See related

Can a Tanning Bulb Be utilized as a Grow Light?

Grow lights are used to grow the light plants receive. It may appear a tanning bed’s lights can perform exactly the same task, but its lights are different. Plants respond best to cool lights, which will not burn or otherwise damage leaf.

Grow Lights

Several kinds of grow lights offer a wide spectrum of lighting and therefore are acceptable for plant development. When natural sunlight isn’t available or restricted, use permeable or light-emitting diode lighting that stays cool. Incandescent and halogen bulbs are also solutions, but use those bulbs with caution because they are hot when on thus can damage leaf.

Tanning Bed Lights

A tanning bed includes ultraviolet lights using short wavelengths. The ultraviolet rays are able to penetrate human skin and cause it to tan in colour. The short wavelengths, however, also can penetrate plant development and cause foliage damage. Tanning bed lights, which are expensive to work with, get warm when lit for the long intervals that would be needed for plant development, and they would damage leaf.

See related