The best way to Remove Tile Paste

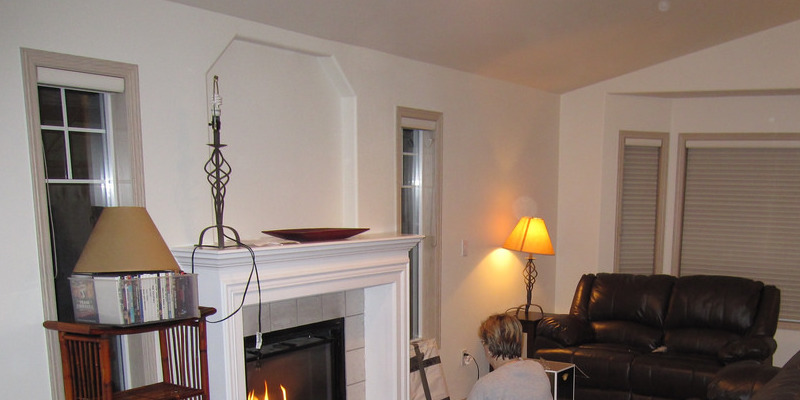
When you have taken the tile off to re-do a ground or wall removing tile adhesive or paste may be nearly difficult or quite easy. The the problem depends on which kind of tile, how it had been laid, what type of adhesive was employed and, most importantly, exactly what the underlying or substrate area is. It is simplest to eliminate any type of tile adhesive from a ground; it may be difficult to eliminate glue or paste from regular dry wall, which isn’t meant for tile program. Do not attempt to eliminate adhesive or tile that contained asbestos, which needs elimination that is specialist.

Pry up a a large part using a prybar or comparable device of both vinyl or ceramic tile, then use a broad straight-edged scraper or a flatbottomed shovel to peel the tiles up and determine adhesive and the substrate. Take using the tiles as much adhesive as feasible. Chip off items that are hesitant utilizing a broad and hammer chisel. Be intense having a concrete or cement backer board substrate.

Scrape wood or concrete flooring using a straight-edged flat-bottom or scraper shovel to chip-off mastic or mortar employed to fasten the tile. Dampen mortar to make scraping more easy. In the event the tile was laid with glue use diluted acid -kind mastic. Sand concrete or wood floors using a belt sander and tough- sandpaper smooth the ground to get a new program and to get cleared of adhesive.

Use a sharp- scraper to remove mastic or thin set mortar from cement tile backer board on both partitions or floors. Soften scrape with quick strokes, and the mastic with acid or a business adhesive remover, maintaining pressure blade to prevent gouging the backer board. Be patient; removing adhesive from backer board is a procedure that is gradual. Than that which you applied to concrete, sand backer board using a belt sander but use a finer grit paper.

If sanding and scraping don’t get rid of all paste or glue resort to industrial adhesive removers. Have a chip of adhesive to tile retailer or a building offer to get guidance on the kind of remover to use. Follow guidelines but use these with caution and only on cement or concrete board.

See related

The best way to Get Rid Of From amp Dishes &; Porcelain Sinks

Marks on dishes or on the inside of porcelain sink are usually due to aluminum pots and utensils. There is no need to to displace the sink or dishes since these marks are not permanent — even though they may not be removed by normal cleaning methods entirely. A light abrasive does not scratch the porcelain area and eradicates mark. Nevertheless, acidic cleansers should be avoided by you. Aluminum marks may be removed by these cleansers however the porcelain is also etched by them and break up its glossy finish.

Rinse dish or the sink with warm tap-water. Wipe it out using cleaning rag or a damp sponge to get rid of any grime build-up.

Sprinkle baking soda on the aluminum marks, covering them entirely. Instead, make use of gel or a gentle scouring powder.

The aluminum marks using a damp sponge. Powder or the nahco3 eliminates the marks without etching the top layer of the porcelain.

Rinse dish or the sink with water that is hot. Wash another time using a mild dish soap along with hot water.

Rinse the sink or dish with water to get rid of the dish soap deposit.

See related

The best way to Eliminate on Grey Slate Bathroom Tiles

Natural jewels can stain, as well as the area of the issue is determined by how porous the rock is and how long or how often the staining happens. Slate is now a standard rock to make use of in the home as a result of its many natural colours as well as texture variations. The components which make slate appealing, yet, additionally cause slate to be impacted by minerals taken in water. To avoid water spots the stuff will be coated by most tile installers having a sturdy water resistant sealer following the slate is installed. Water can be actually reacted to by the type of sealer and make white, patchy or ringlike spots. Re-sealing and cleaning the tiles is typically somewhat effective at mitigating the spots.

Add washing soda into a little bowl of plain water. Washing soda is sodium carbonate. This is a powerful alkaline compound used to eliminate stains from laundry as well as other stuff. Mix and water. Dunk a nylon-bristle brush in the mix and scrub the water spot. Rinse properly using water and dry instantly. Carry on with a more competitive scrubbing device when it does not work.

Rub steel-wool on the water spot using circular or round motions. Steel wool can be obtained from rough to good, but begin with all the variation that is rougher and end utilizing the steel-wool that is great. Vacuum the tiles to eliminate the broken pieces of steel all. When you seal the tiles will corrode any steel left. Carry on using a chemical paste in the event some staining is nevertheless left by the steel-wool.

Blend teaspoon of lemon-juice and 1/4 cup of baking soda, 1/4 to 1/2 cup of water into a heavy paste . Scrub the paste into the slate utilizing the nylon-bristle brush. Rinse with water and dry instantly. Let the tiles to dry for 4-8 hrs.

Coat the tiles utilizing a pH-neutral, water resistant slate sealer. Apply three layers, letting each layer to dry for 24 hrs. The slate will most likely appear wet subsequent to the sealer is put on.

See related

The best way to Tighten Stair Banisters

Children do stairway are seen by n’t as a device employed to transit between degrees; slide-down or they see them to rush up — and banisters frequently function as their brakes. The best-constructed banisters on Alamo Square finally start to wobble if due simply to temblor or a base. Returning them to their secure and durable nature needs a little forbearance and sleuthing because joinery techniques are determined by abilities and the preferences of the carpenter who built the stairs.

Fix the posts — the vertical posts situated at either end of the banister as well as on landings. Some newels are connected to floor joists, some sit-in iron or metal plates. Drill holes to to displace those which have worn too big to support carriage bolts, lag bolts or brackets. Replace any stripped or damaged components. Some newels have a suitable fixing bolt through the center, much like the bolt through segments of a lamp that holds the elements together. Face Lift or unscrew the ornamental atop of the post and tighten this bolt using a socket wrench.

Replace on the railing. Examine dowels or the counter-sunk straps that join together the segments of the railing. Paste drill pilot holes that are new for straps and dowels. Make use of a hand router to generate a brand new slot for every single strap to sit-in and fill the aged counter sink holes

Wall mounts, if current; include them to assist railings that are secure. Drill pilot holes for screws that are brand new into studs. In the event the mounts have to be reattached in the exact same place where they’ve worn their holes, fill the holes with little dowel segments dunked in a little carpenter’s adhesive to offer anchors for the screws. Replace the screws on the railing aspect of the mount with brass screws of a diameter that is somewhat bigger to fix the rail.

Tighten railing bolts that connect the rails. Railing bolts could be drilled to the railing or viceversa via the the top of the post. Accessibility to tightening nut or the bolt head is obtained by way of a cavity drilled in the post or on the underside of the railing. The entrance pit is usually hidden ornamental metal cover or with a wood stopper. Pry the cover off and make use of a modest box- mix or finish wrench to tighten these difficult-to-achieve alteration bolts.

Paste or substitute balusters. Although a railing that is wobbly wills not secure, it is supported by them. Toenail tops or foundations; nail during the outside surface with an angle down through the foundation to the stair tread. Add a little wood glue the wood h-AS shrunk straight back as it dried as well as where foundations remain in holes. In case a baluster has turned somewhat, it can be connected with double-sided screws wriggling it back into position might tighten it up and called baluster fasteners.

See related

The best way to Replace Window Sunscreens

Folks residing in regions with times that are extended and glowing sunshine or these with windows facing the beams of the sunshine, gain in the installing of sunscreens on windows. The thickly woven fiberglass displays are installed on the exterior of windows in frames, blocking sunlight. Restricting the sun heating the interior of your home up reduces the quantity of air conditioner desired. So winds pass through the sunblock net is permeable and visibility, while decreased, is preserved. Suntan lotion is easy to replace in frameworks and needs few resources, no expertise and small time.

On a level work surface with all the interior of the sunblock framework facing up, place the present sunblock framework.

Locate the conclusion of the spline that fixes the display to the groove in the framework, ease a tiny screwdriver and raise it up.

Take away by after the groove where it’s embedded and carefully pulling right back on the finish.

Measure the measurements after removing it in the framework of the present sunblock. Cut a bit of replacement sunblock with large scissors that’s 1-inch bigger in relation to the measurements of the sunblock that is old.

Place the replacement sunblock within the framework to ensure the opening is covered by it having an equivalent quantity of suntan lotion going past the groove on all sides.

Put one end-of new spline along with the display and on the groove in the top-left-hand corner of the framework.

Hold the display- roller in a single hand and shove on display and the spline to the groove. Roll the display-spline roller clock-wise over the while directing the spline along with groove and the display using another hand. Continue round the framework before you’re straight back a T the begin level.

Trim the surplus sunblock from round the groove and re install the window is framed on by the sunblock.

See related

Cleaners to get a Wool Carpet

In the event that you are seeking to add a bit of heat along with sophistication to your own Bay Area house, consider purchasing wool carpets. Even though the eyecatching floorcoverings may be expensive, they are going to immediately update the appearance of any space. While making sound boundaries between downstairs and upstairs rooms, wood or tile floors soften. Clean the carpets frequently to keep them in excellent shape.

Vacuum Cleaner

Frequently vacuuming your wool carpet is essential in case your house has significant foot traffic. A great-quality vacuum will eliminate everything from soil to dander in the floor. It’s possible for you to opt for a vacuum using a HEPA – filter, that will remove other allergens as well as animal fur, in case you own animals or have family members with allergic reactions. Before deep-cleaning it to remove any particles constantly vacuum the carpet.

Stain Remover

Although wool is super-tough, it is nonetheless prone to spots from daily damage. Strike the area instantly using a stain remover developed especially for use in case you spill food or liquids like wine on the carpet. Blot the stain with a paper-towel or cloth use the remover, and to get rid of any extra merchandise. Enable the remover to relaxation on the wool in accordance with the recommendations of the manufacturer’s and clear with hot water. Constantly assess for color fastness in the wool by first implementing the remover to an place, including the backside of the carpet.

Light Detergent

Spot-clear your wool carpet by means of a solution having a gentle detergent, like dish soap. To generate the alternative, pour about 1/2 cup of detergent in to a pail of cool water and stir to to combine. Make use of a sponge or cloth to rub on the water to the soiled aspects of the carpet. Take care not to make use of cleansing instrument or an abrasive cleanser, which may damage the wool. Rinse the soap having a sponge or fabric dampened with water that is clear, and make it possible for the carpet to airdry.

Steam Cleaner

When your carpet needs heavyduty cleaning, a steam cleaner is the appropriate tool for the occupation. A steam cleaner uses hot-steam and a light detergent to softly lift grime, spots and deposits from the wool. With a steam cleaner to to clean the carpet is perfect when the floor-covering is heavily-soiled or if you are in possession of a sizable region to scrub. Examine the detergent on an inconspicuous region before utilizing it should you steam-clean the carpet yourself, and consider treatment to abandon the carpet overly wet or to not use a lot of detergent.

See related

The best way to Grow a Hibiscus

Shrubs are sub-tropical deciduous crops that create big, brilliantly coloured blooms that attract hummingbirds and butterflies in to your backyard and grow to a height of 15 feet. The balmy summers and winters and damp, foggy days supply appropriate conditions for hibiscus while the San Francisco region is not sub-tropical. Hibiscus roots readily from cuttings in springtime, in order to very quickly take up a fresh plant from an existing plant.

Find a stalk as a pencil in the newest development of a hibiscus that is established. Cut a 5- to 6-inch size of the stalk in regards to a quarter-inch below a node with at least another node on the stem.

Fill a container with one part peat and three parts sand to within an inch of the lip of the container. Lightly pat on the container on a good surface to to be in the medium.

Strip the leaves in the underside part of the cutting, leaving a few leaves close to the very best. Shove on the cutting to the peat and sand combination only far enough so that it supports itself.

Water the medium that is developing until it’s damp but not water-logged and put the container in a location where it receives lots of sun that is diffused. Keep the medium moist that is growing, as well as the roots that are hibiscus should type in a few weeks.

Transplant the recently recognized hibiscus right into long-term place in your backyard or a bigger container following the roots have created and new development is noticed by you also.

See related

The best way to Mend Scratched Windows

Windows that are marred are a standard issue for property proprietors that have . Kids, Pets and activities can also cause window scrapes, resulting in fix that is required. The crack is not overly deep and provided that your window is not ruined, the seal between panes is not broken, surface scrapes are reparable. You’ll probably have to replace the window or have it professionally serviced in case you see condensation or dampness between the panes.

Examine the depth of the window scrape. In accordance with Andersen Windows, in the event the scratch is deep enough you could catch the edge of your finger nail in the scrape, it is also deep to get rid of. If so, clear the window with glass cleaner to decrease the look of soil in the fracture. Replace the window it becomes a crevice that additional damages the window or in the event the scrape is ugly.

Use a specially constructed glass compound with cerium oxide for scrapes which aren’t felt using a finger nail. Choose the item from discount store or a nearby hardware store. Use a bit of the compound to the scrape and wipe the region using a material that is soft. Use mild pressure to shine the area crack, eliminating light scratches, scuffs and ground -in grime. Wipe away excess compound using a cloth that is soft.

Use detergent, tooth-paste or mineral spirits to the crack. Make use of a circular motion with light pressure to rub on the whole outermost layer of the crevice using the compound that is specified. This procedure does not fix the fracture but does remove deposits and deposit, creating the crack observable. Use glass cleaner to get rid of left over detergent, mineral tooth-paste and spirits in the window.

See related

The best way to Vacuum a Wool Shag Rug

Wool is a tough and normal fiber for carpets. Area or accent rugs in wool shag originated with steady creation for this day, in Greece in the fifth-century, in accordance with the Sheffield School of Interior Design. Rugs, with extended strands of fiber, attained popularity as rug in the 70s. If you’ve lately bought a house, you may pick wool shag rugs also referred to as rugs, to warm the floors that are empty in a few of your chambers. Bigger carpets need vacuuming, although it’s possible for you to shake a little wool carpet to make sure it stays clean.

Disconnect your hoover in the electric source.

Take away some roller bar in your hoover or the beater bar. The roller with bristles will harm your wool rug.

Set an upholstery brush or brush that is comparable with bristles that are little on the end of the hose. Some sweepers have a shag rug rake accessory with plastic bristles about an inch-long, which is useful to separate and elevate the carpet fibers. Put the brush in the middle of your rug so that you function to the edge and can begin in the middle.

Stopper your hoover to the energy supply.

In case your sweeper has over one speed turn the sweeper on low-speed. In case your sweeper has a suction regulator, correct the suction to “reduced.”

The wool shag rug gradually, working in the middle to the edge so that you don’t catch periphery in the sweeper or raise the corners. Turn over the rug sometimes and vacuum the flooring as well as the back side.

See related