The way to Landscape With Dianthus

Dianthus plants, commonly known as “pinks” in reflection of this pinked or zigzag-patterned petal edges, provide the lawn with an extract of fascination. These herbaceous blossoms are both visually beautiful, with their blossoms in hues of pink, red, lavender or white, and fragrant, with spicy scents in the atmosphere. In their vast array of alternatives, you should decide on a plant that thrives in your specific region. Dianthus plumarius does well in U.S. Department of Agriculture plant hardiness zones 3 through 9, while “Parfait” pinks (Dianthus x “Parfait Series”) perform well in all USDA hardiness zones.

Incorporate Dianthus plants at the front of garden borders. Plant low-growing plants, like “Parfait” pinks, such as a burst of color that helps to anchor plants that are taller. These plants attain a height of 6 inches to 1 foot. Add Dianthus plants to borders containing company plants, like snapdragons, for additional visual interest.

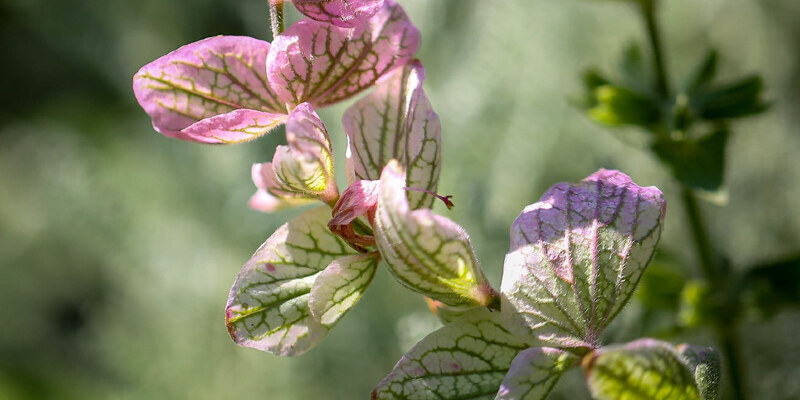
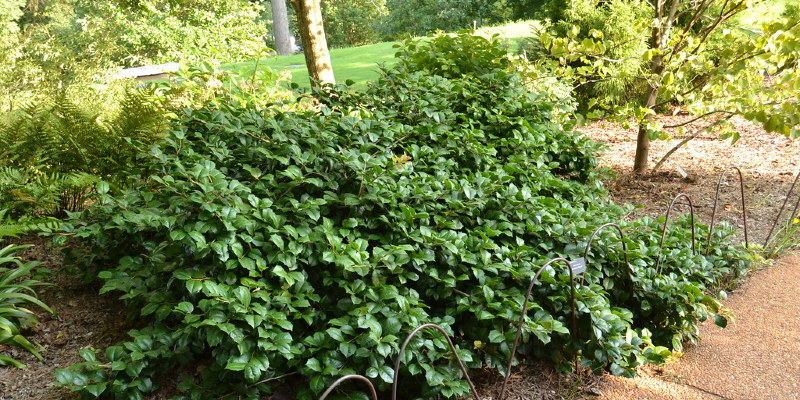
Landscape using Dianthus plants as ground cover using a mat-forming species for visual interest in the lowest point of the landscape. Plant Dianthus plumarius because of its gray-green evergreen foliage, height of up to 1 1/2 feet and aromatic 1-inch flowers in colors like purple and white.

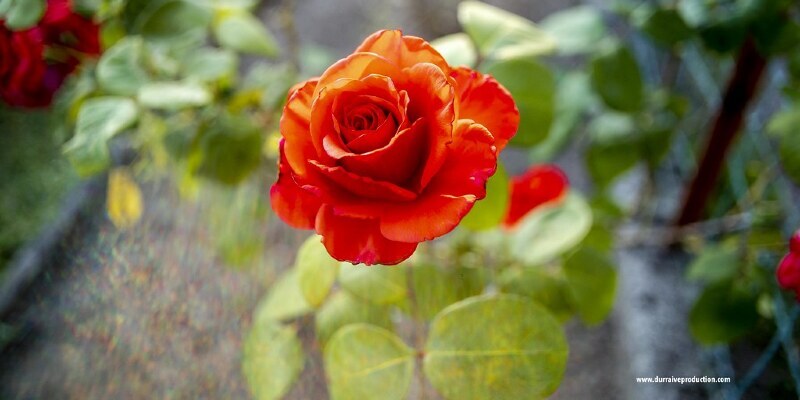
Grow taller varieties with bold color as a focal point in the garden for greater visual impact, like “Can Can Scarlet” (Dianthus chinensis “Can Can Scarlet”) to its bold red colour and height of up to 1 1/2 feet or “Ideal Violet” (Dianthus chinensis “Ideal Violet”) for its purple colour and stature of up to ten inches.

Plant Dianthus plants that attract butterflies to the garden, like “Parfait” pinks. Landscape with these flowers by putting them using a transparent view from a window so you could enjoy visiting butterflies whether you’re indoors or out.

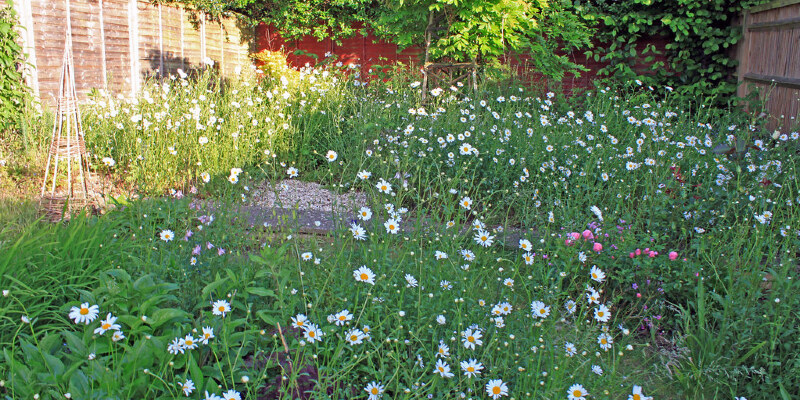
Landscape using Dianthus flowers as mass putting for added dimension within the garden. Pick Dianthus plants that work well when positioned near one another for an expanse of visually satisfying flowers. Plant Sweet William (Dianthus barbatus), for example, which exhibits flowers in pink, red, white and bicolor, reaches a height of 2 feet and a spread of 1 foot, and also thrives in USDA hardiness zones 3 through 9.

See related

The very best Soil Forms

There is no ideal soil type. The rich clay preferred by a single plant may be too thick for the roots of the other. However, every soil type could be maximized to help plants thrive. Soils are divided into four general types based on the particles located in the mixture. Adding the right amendments enable you to transform mediocre soil into a good growing medium, regardless of what sort of soil you have to work with.

Sandy Soils

Most of the coastal areas of California feature soils with a high sand content. Sandy soils don’t stick together and are easy to turn, allowing for strong root growth. They drain quickly and provide plenty of air pockets to help plants that are prone to root rot, but this can make it hard to keep plants sufficiently watered. Sand does a poor job of holding nutrients too. The University of California Cooperative Extension Master Gardener Program recommends combining manure and aged compost into light, sandy soils to retain water and add much-needed nourishment.

Clay Soils

Clay is composed of extremely fine particles that pack together tightly. This leaves very little room for atmosphere and makes water drain very slowly. Many gardeners struggle to turn deep, dense clay soils. The tight composition of the type of soil can be beneficial since it retains nutrients better than other soil types. The Missouri Botanical Garden says that mixing in peat moss, aged sawdust or decomposing straw can loosen up tight soils and support drainage.

Silt Soils

Silt particles are larger than clay particles but smaller than pieces of sand. This soil component feels silky when wet and lacks the stickiness of clay. Silt is frequently found at the bottom of ponds and other bodies of water. Soils that have a lot of silt provide lots of nutrients for crops without limiting air flow around the roots, in accordance with National Geographic. However, these small particles are easily compacted and slow to drain if insufficient organic matter is combined in. Silt needs the identical sort of organic amendments used for clay soil to improve the texture.

Loam

Many gardeners believe rich loam to be the ideal garden soil. Loam unites all three soil particles with lots of organic material to form a mixture that’s loose, drains at a moderate pace and supplies a lot of air flow. The high organic matter content and parts of clay and silt make sure that loam has lots of nutrients. Most plants can thrive in loam, even if they also develop in thicker or looser soils. Amendments can allow you to make clay, silt or sand soils more like loam.

See related

Greenhouse Lighting Requirements for Rumors

Rumors (Solanum lycopersicum) are warm season vegetables which grow best in full sunlight and warm summer temperatures. Although commercial greenhouse manufacturers in Canada and Europe absorb the higher prices of power necessary to cultivate ocean tomatoes under approximate lighting, growing them in sunlight lighting below 15 percent of summer lighting is typically not practical in the USA. For dwelling growers, the expense of supplemental lighting compared to yield is much more prohibitive. But growers in warmer climates can achieve good yields of strawberries in winter lighting.

Spring and Fall Harvest in Warm Climates

In California and other states with sun and mild temperatures in the winter, house growers can harvest good crops of greenhouse tomatoes between November and May. High daytime temperatures and increased sunlight from mid-May during September produces poorer greenhouse tomatoes. California growers can expect a return of 8 to 10 pounds of strawberries per plant during a two to three month period from the fall along with 15 to 18 pounds of tomatoes per plant in a 4- year into 5-month-long spring harvest.

Spring Harvest at Cooler Areas

Because of the high price of supplementary lighting, growing winter tomatoes in greenhouses isn’t wise in northern nations which have short days and low sunlight. But growing and harvesting greenhouse tomatoes in the spring is practical in areas that have spring sunlight and heating prices low enough to maintain nighttime temperature between 60 and 62 degrees Fahrenheit.

Achieving Maximum Natural Light

Growers in areas with enough winter lighting to grow greenhouse tomatoes typically find their greenhouses north to south and away in the shade of buildings and trees. Rows of strawberries running north to south get an even distribution of lighting during the day. Northern walls painted white will reflect light back onto the strawberries. Painting inside surfaces white and placing reflective white vinyl over the ground between rows of strawberries help maintain light intensity.

Supplemental Lighting

The benefits of using metal halide lamps to provide supplementary lighting is marginal because the lights consume high amounts of power. Oregon State University horticulturalists state at least 650 footcandles of light on tomato foliage is needed for normal growth and a full crop of tomatoes. A 1,000-watt metal halide will yield about 600 footcandles over an area of 112 square feet. That quantity of lighting would yield a minimal crop of tomatoes and about 32 such fittings would be needed for a 30-by-120-foot greenhouse. The cost of maintaining these lights will be different according to regional differences in the expense of power.

See related

How to Care for Indoor Potted Majesty Palms

Majesty palm (Ravenea rivularis), is a robust, low-maintenance tropical palm with graceful, feathery fronds. Majesty palm is a warm-climate tree acceptable for growing outside in U.S. Department of Agriculture plant hardiness zones 10 to 11. Even though the palm produces a beautiful indoor plant in warmer climates, it may eventually become too large, as older trees reach heights of 15 to 20 feet.

Water majesty palm whenever the surface of the soil feels slightly dry to the touch, but never let the soil become completely dry. Water thoroughly, then let the pot drain prior to returning the grass to the drainage saucer, as the plant may develop stem decay and other diseases in soggy soil.

Fertilize majesty palm every 3 months during spring and summer, employing a general-purpose, slow-release fertilizer based on the directions on the label. Avoid excessive fertilization, which may result in spotted foliage.

Place a majesty palm where it will acquire bright, indirect sun, including an east-facing window or a spot three to five feet away from a sunny window. Avoid bright, intense sunlight, which may scorch the leaves.

Protect majestic palm from chilly air from doors, doors windows or air conditioning vents. Even though majesty palm tolerates temperatures as low as 35 degrees Fahrenheit, it prefers normal room temperatures between 70 and 80 F during the day and about 10 F cooler at night. Throughout the winter, cooler temperatures — between 55 and 60 F — tend to be safer.

Repot the majestic palm I to your container one size larger when the plant outgrows its grass, typically every two to three yearsago Do not repot more often than necessary, as fingers perform best when their roots are slightly crowded.

See related

Arborvitae Tree Identification

Arborvitae (Thuja occidentalis) are coniferous evergreen trees in the cypress family. The leaves and bark are high in vitamin C, and the title “arborvitae” means “tree of life” in Latin. The tree is indigenous to North America and is cold hardy to U.S. Department of Agriculture plant hardiness zone 3. There are several characteristics of the arborvitae, also called white cedar, that differentiate it from other conifers.

Size and Shape

Arborvitae are narrow, pyramid-shaped trees which come to a stage on top. They climb about 30 feet tall and 10 feet wide from the home landscape, using a few arborvitae in their natural atmosphere growing up to 60 feet tall. The branches are covered with foliage from the top of the tree into the bottom branches which could grow all of the way to ground level, unless they have been damaged, painted by deer or other insects, or planted where the base of the tree is scaly.

Foliage

The foliage of the arborvitae grows in flat sprays using miniature scale-like leaves, unlike the outward-growing needles of a number of different conifers. The newly forming leaves are feathery, and they obtain their scale-like look as they age. Foliage is green, sometimes turning yellow during winter months, and the person leaves are far less than 1/8 inch wide. Leaves are arranged along branchlets that develop in flat sprays from the principal branches. When crushed, the leaves emit a distinct odor.

Bark and Cones

The bark of the arborvitae is gray, turning a reddish color as it ages. Furrows from the gray bark show that the reddish color that will eventually be more widespread. The tree creates male and female cones which are just 1/2 inch extended. The cones form at the tips of branches and grow in an upward direction. They start out green and turn brown as they mature. Unlike the open cones of pines, arborvitae cones look like miniature scale-covered eggs.

Location and Pests

In the home landscape, arborvitae are frequently seen growing in rows of closely-planted trees to form privacy screens, windbreaks or boundaries. Small groups of two to five trees are sometimes planted together as an accent in the lawn. In the wild that the trees are generally found growing in wet, low-lying areas. The trees need full sunlight, therefore arborvitae growing in shady areas will likely look scraggly and feeble. A pest commonly associated with arborvitaes is that the bagworm. Bagworm presence is indicated by the hanging pods they produce which may be mistaken for cones, except the forks hang from the branches while the cones grow upward.

See related

Landscaping With Hostas

There are around 2,500 cultivars of hostas (Hosta spp.) Available on the marketplace. This huge category of plants is wildly popular among gardeners. Their preference for shade makes those plants a good selection for filling semi-shady spots in the landscape. Hostas feature unusually complete, broad leaves that convey a feeling of near-tropical lushness at U.S. Department of Agriculture zones 4 through 8.

Appearance

Hostas are primarily known for their complete leaves that come in blue, green, gold and white, depending on the variety. These leaves are what attract many home gardeners to hostas, but hostas also create flower stalks. Hosta flowers are trumpet shaped and small, and somewhat diminutive when compared with the large, striking leaves. You might find these flowers are an extra bonus on your landscape, however, since you opt for the wide range of hosta you would like to grow, foliage is going to be a larger consideration. Hosta’s foliage makes this plant a superb specimen for filling empty garden spaces between shrubs and flowering plants.

Location

Hostas are known as shade tolerant plants, however, some varieties of hostas are more shade tolerant than many others. Hostas with white or gold leaves need a little morning sun with afternoon shade. Blue- and also green-leaved hostas will thrive in deeper colour, with less sun. Landscaping with hostas means selecting the right place for your chosen variety with the necessary lighting conditions.

Soil

Provide the right sort of soil conditions for successful hosta development. Hostas thrive in soils that are somewhat acidic and rich with organic matter. You can test the pH of the ground having a kit purchased from a nursery or garden center. If your soil is acidic, compost is a suitable amendment for your soil. If your land is somewhat alkaline, peat moss can be added to lessen the soil pH.

Companion Plants

Deciding on the best companion plants for your hostas will enhance your landscape. Flowering plants will add cosmetic beauty to your landscape, while matching nicely with hosta leaf. Bulb flowers like tulips (Tulipa spp.) , hardy in USDA zones 4 through 10, will blossom in the early spring and fall following blooming. Hostas is used to hide these flowers during their fall. This can work with other perennial bulb, corm and rhizome blossoms like irises (Iris spp.) , hardy in USDA zones 3 through 10, and amaryllis (Hippeastrum x hybridum), hardy in USDA zones 8 through 10. Additionally, hostas pair well with non-flowering plants like ferns, because the differences in texture between the two plants provide visual interest in the landscape.

Care

Proper care will keep your hostas looking good on your landscape for several years. Although easy to take care of, hostas typically cannot survive without supplemental water. Hostas need at least 1 inch of water each week. Establishing a regular watering program when natural rainfall doesn’t fulfill these needs will stop hostas from drying out. Water your hostas first in the morning or in the evening to allow your hosta to consume as much water as you can without competing with the sun’s evaporation. You can fertilize your hosta plants in the spring, late spring and center summer using a balanced 10-10-10 fertilizer.

See related

Can a Tanning Bulb Be utilized as a Grow Light?

Grow lights are used to grow the light plants receive. It may appear a tanning bed’s lights can perform exactly the same task, but its lights are different. Plants respond best to cool lights, which will not burn or otherwise damage leaf.

Grow Lights

Several kinds of grow lights offer a wide spectrum of lighting and therefore are acceptable for plant development. When natural sunlight isn’t available or restricted, use permeable or light-emitting diode lighting that stays cool. Incandescent and halogen bulbs are also solutions, but use those bulbs with caution because they are hot when on thus can damage leaf.

Tanning Bed Lights

A tanning bed includes ultraviolet lights using short wavelengths. The ultraviolet rays are able to penetrate human skin and cause it to tan in colour. The short wavelengths, however, also can penetrate plant development and cause foliage damage. Tanning bed lights, which are expensive to work with, get warm when lit for the long intervals that would be needed for plant development, and they would damage leaf.

See related

Caring for 'Baby Tut' Grass

A swamp-loving sedge, “Baby Tut” grass (Cyperus involucratus “Baby Tut”) grows well in sun or shade, can survive in standing water and will thrive with minimal maintenance. This cultivar of umbrella sedge grows in U.S. Department of Agriculture plant hardiness zones 9 through 11, although it can occasionally survive winters in USDA zone 8. Even though “Baby Tut” makes an attractive foliage plant — it grows in clumps 24 inches tall and stays green year-round in light climates — it is deemed invasive in some areas.

Keep the Soil Damp

“Baby Tut” grass needs consistent moisture to grow well. Keep the soil consistently damp with weekly watering. This moisture-loving ornamental grass can also grow in wet areas, where standing water tends to collect, without getting waterlogged or rotting. Avoid letting the soil dry out, especially If you’re growing “Baby Tut” in containers. Remember to look at the potting soil moisture each day during hot weather. When it’s hot, planters dry out quickly especially if they are made of wood or unglazed clay.

Add Monthly Fertilizer

Although this sedge grows well by itself, you can give “Baby Tut” a nutrient boost once a month with a balanced liquid fertilizer. A dilution of 2 oz of liquid fertilizer with 1 gallon of water at a watering can works well. Use the water-fertilizer dilution to soak the soil around each “Baby Tut” plant. A balanced fertilizer is any formulation where the three numbers are the same. Some typical balanced formulas comprise 3-3-3, 5-5-5, 10-10-10 or 20-20-20. The three numbers suggest that sulfur, potassium and phosphate are at equal proportions.

Spring and Fall Trim

You can keep “Baby Tut” grass looking clean by giving it a trim in fall. Start looking for any dead material and cut it out using a set of garden shears. Cut as close to the soil line as possible. In frost-free areas, “Baby Tut” stays green during the winter but at USDA zone 9, a brief winter frost can kill some or all the leaves. Remove any frost-damaged leaves early in the spring. After pruning “Baby Tut”, dip your shears at a bucket containing equal parts water and conventional rubbing alcohol to get rid of any pathogens on the blades.

Pest-Free But Invasive

Few insects’ bother using the class leaves of “Baby Tut” and diseases infrequently take hold. Rather, “Baby Tut” and other umbrella plant cultivars are the pest, spreading invasively in mild climates where frosts fail to fully kill the roots each winter. Avoid planting it in areas that are open to natural lakes or rivers. After “Baby Tut” gets loose, it can take over and displace natural species. Growing “Baby Tut” as container plant might help to keep it under control. Use standard potting soil if you choose this method and use a pot with drainage holes.

See related

Ways in Which Herbicides Destroy Weeds

Herbicides are chemicals that are utilized to kill weeds in lawns and gardens. The scores of herbicides that exist attack weeds in different ways. Herbicides fall into two general classes, however. Some are selective herbicides formulated to kill specific weed species while leaving the rest of the plants unharmed. Other herbicides are non-selective, formulated to kill all plant life wherever they’re applied.

Methods of Destruction

1 general class of herbicides strikes weeds’ or all plants’ cell structures. Some products in this category mimic plants’ natural growth hormones to trigger uncontrolled cell growth that breaks down plant constructions while other products destroy enzymes the plants need to build and maintain cell walls. Another general category of herbicides disrupts the chemical process of photosynthesis, by which plants convert sunlight energy to food energy. A third general category of herbicides disrupts plants’ ability to synthesize the amino acids required to soften food energy for growth and reproduction.

Before or After Germination

Herbicides are also classified by if they behave before or after plant seeds germinate. Pre-emergent herbicides usually are put on the ground. They soak in the soil and prevent seeds from invading or kill the sprouts as soon as they break the seed coat and before they get to the ground surface. Post-emergence herbicides are applied to weeds or other plants that already sprouted. Post-emergence herbicides are split into contact and systemic products. Contact herbicides kill the plant parts they touch, like the leaves, but aren’t transported to the roots. They work well against annual weeds. Systemic herbicides travel throughout plants to kill roots and the rest of the plant parts, and they’re most effective against perennial weeds.

Age and Weather

Weeds’ age and the weather affect herbicide activity. Young, actively growing weeds are more susceptible than fully mature weeds to herbicides, and a few grass species develop herbicide-repelling leaf hairs or waxy leaf coatings as they mature. Rainfall close on the heels of the herbicide application can wash off the weedkiller before it can act. Really dry weather conditions may cause fluid herbicides to disappear before they penetrate leaves. Dry conditions also result in leaf pores to close, blocking their uptake or absorption of the herbicide. Herbicides can be affected by light, also; a few break down quickly in bright light so should be applied just in night hours. Low temperatures and high winds also tend to decrease herbicide uptake.

Herbicide Resistance

Over the years, weeds can become immune to specific herbicide products through natural selection. Individual bud plants that survive herbicide applications grow and spread their seeds, creating future generations of more-resistant weeds. Eventually, all the weeds are immune. Strategies for preventing or minimizing herbicide resistance include crop rotation, using herbicides with various modes of activity singly or in mixtures, killing weeds in fallow areas to prevent the spread of resistant weeds and combining mechanical techniques like pulling weeds with herbicide procedures for weed management.

See related

Will Laying Cardboard Over Goathead Plants Kill Them?

If you fight against invasive goathead weeds (Tribulus terrestris), you are likely familiar with why they are also called puncturevine crops: The sharp, sticky seedpods easily pierce skin and substances much thicker than the skin, including — possibly — cardboard. Still, cardboard can be a way to kill these plants that are invasive, as long as it’s used.

Goathead Everywhere

Goathead grows in every state. The pesky plant dies at the first frost but reseeds prolifically, also in regions which don’t see temperatures, annually, it continues to sprout and grow. Before it sets seedpods the best method to kill goathead is to pull it out by hand. This may not be a sensible option, because it spreads so quickly. One option is to smother the weeds if you do not need to resort to chemical weedkillers.

Smothering Weeds

Weeds require air, water and light to develop, and goathead is no exception. Block its accessibility to those things, and it will fail to grow — depending on how well access is obstructed. Mulch alone will leave holes which will still allow light and water to work their way through, and gently laying a single sheet of cardboard atop a goathead plant won’t work well, if at allNot only will lighting, water and air continue to be able to get inside, but the cardboard will likely dismiss when the wind picks up. The cardboard has to be implemented in this manner that the goathead plants are smothered.

Cardboard Factors

To kill and interrogate goathead several sheets of overlapping cardboard across the crops, then cover that with a thick layer organic material, such as bark or straw, to weigh down it. The mulch, including the cardboard, ought to be a minimum of three inches thick. As time passes, rain will make the cardboard decompose, but with this technique can still kill up to 75 percent of the weeds at the first year, advises Birds & Blooms magazine.

Control Over Time

Leave the cardboard a year — longer if you do not need to use the area for whatever else. Since seeds are viable in the soil for five decades, you will most likely have to reapply the cardboard after it’s decomposed, and mulch. The seeds are gone or dead, till the ground, once you’re certain — cardboard provides nutrients to the ground, and you’ll have a nice, rich patch of dirt in which to develop plants that are new.

See related