How to Germinate Red Yucca Seeds

Red yucca plants (Hesperaloe parviflora) are succulents native to the Southwest area of the United States. This evergreen plant produces grass-like leaves reaching 4 feet tall and wide. Flowers bloom through the summer, attracting hummingbirds and butterflies . This agave plant is excellent in areas where water conversion is a concern. Plant red yucca from land or on a slope when located in the Bay Area’s wetter areas. In which the conditions are controllable, start the seeds indoors.

Wash a flat seed tray with warm water and wash in 1 part bleach mixed with 9 parts water. This removes plant ailments that are lurking and removes all debris. Enable the tray when inserted so the soil does not turn to mud to dry thoroughly. If holes are overlooking, poke them in the base of the tray having a ice pick. Fill the tray with cactus soil mix that is commercial.

Spread the yucca seeds evenly. Cover the seeds with a scatter of cactus soil. Use a spray bottle to wash the soil. Cover with a bit of clear plastic to make a greenhouse effect. This keeps the humidity high.

Put the seed tray in an area. Remove the plastic and spray the soil daily. Keep the tray in bright light until the seeds sprout. Once sprouted, water until the yuccas are large enough to transplant to individual plant pots.

See related

Great Design Plant: Deer Grass

Plants should look great in the backyard, but they must also do good too. Deer grass (Muhlenbergia rigens)is a no-brainer: indigenous, adaptable, wildlife food source and shelter. It is said that the powerful sweep of the welcome western United States native could be credited to Native Americans, who among other things wove its foliage to baskets and storage vessels. While we have only ourselves to blame for the rampant spread of many undesirable plants, deer bud reminds us of people’ great deeds.

The western United States includes numerous varied growing conditions and climates — not all them the friendliest or easiest to handle. Consider this unthirsty, easygoing indigenous your free pass; it may manage situations from irregular frost and intense sun to drought and seasonal flood.

Edger Landscape Design

Botanical name: Muhlenbergia rigens
Common names: Deer bud, deergrass, meadow muhly
USDA zones: 7 to 11 (find your zone); hardy to 15 degrees Fahrenheit
Water requirement: Low once established
Light requirement: Entire sun but tolerates some shade
Mature size: 4 to 5 ft tall and wide
Benefits and tolerances: Drought tolerant; provides shelter for birds; birds eat seeds; tolerates urban conditions; mature plants are deer resistant
Seasonal attention: Evergreen; darkened plumes project 2-3 feet above foliage in summer and autumn
When to plant: Plant from toddlers in autumn

Poetic Plantings

Distinguishing traits. Tired of waiting for your nursery purchases to fill in? Grass grows to full size in a couple of seasons.

Deer bud is a big, bunching, warm-season bud. It may be confused for pampas grass, with its own green strappy leaves and silvery floral tufts. But unlike the rampantly invasive pampas grass, we can welcome indigenous deer bud into our gardens with open arms. Some restoration projects throughout the western United States have deer grass as a substitute for invasive grasses like pampas grass.

Luciole Design Inc..

Grass requires next to no grooming. Leave this up for wildlife throughout autumn and winter and allow its gold color light an otherwise dormant backyard.

Edger Landscape Design

The best way to utilize it. You’d be hard pressed to find means not to utilize deer grass in the backyard. It thrives in full sun and well-drained soil, but is nice with some shade and seasonal flood. Mass deer bud with other flowering natives, especially pollinator attractors, such as a gentle and meadowy wildlife sanctuary. You will want to leave lots of room, a few feet between plants, to love deer bud’ soft, mounding form once it fills in.

Should you prefer something simpler, use deer bud as a specimen. Its breezy texture may also be used to soften architectural succulents and Southwest natives, without even making the look overly cluttered.

Deer bud is also a garden problem solver. Unstable stream banks and hillsides may benefit from the root system.

Urban Oasis

Planting notes. Western U.S. natives, though drought tolerant and low maintenance, may be finicky about growing conditions — the right drainage, sun exposure and soil are crucial. This isn’t the case for deer marijuana, a tolerant and fairly fuss-free bud. Described as very elastic, deer grass thrives in full sun, even reflected warmth, but tolerates some shade.

Located along riparian zones, it tolerates times of dry soil and times of seasonal flood — just be sure it does not stay too wet for too long. To start, water it regularly. Afterward deer bud can go literally all summer without watering, but additionally, it will do just fine with a summer water. Browning leaves in summer might mean that your deer grass is a little thirsty.

Deer grass could be cut back in late winter, just before new growth pushes out, but many indicate that a very simple rake-through for dead foliage is everything you need. Should you decide to trim and tidy up your bud, wait as much as you can, as many indigenous and beneficial critters overwinter in its own foliage.

See related

Rocky Mountain Gardener's April Checklist

Planting is the title of this game in the April garden. Plants in all kinds could be installed whenever the soil is workable and warm. At the meantime attend the final of the spring cleanup chores and get your yard in shape for the coming season. Appreciate the symphony of greens that’s being played right now by all of the emerging new foliage.

Jocelyn H. Chilvers

Plant bare root plants. Roses, clematis and young fruit trees are commonly available for sale in our area this month, as well as asparagus, rhubarb, berries and grapes.

Bare-root planting is a cheap alternative that accompanies a little window of time to execute, so take advantage of this opportunity. Select plants that have not leafed out yet using a well-developed, healthy root system (not dried out or rotted). Plant them as soon as possible — if not — after purchasing and keep them moist until the root system is created.

Jocelyn H. Chilvers

Transplant or divide crowded perennials when new growth emerges. Summer and fall bloomers such as asters, hummingbird flower (Zauschneria spp), Maximillian sunflower (Helianthus maximiliana), gayfeather (Liatris spp), tall garden phlox (Phlox paniculata), coneflower (Echinacea spp) and ornamental grasses might need attention.

A plant using a dead heart or a lack of blossoms last year might indicate that it has to be divided. Here’s how.
Use a sharp spade to dig the plant using just as much of its root system as you can (6 to 12 inches beyond the drip line). Remove some of the soil from the root ball and pull on or chop it into big sections that include both stalks and roots. Replant the divisions — or discuss them with a friend — and water completely.

Beertje Vonk Artist

Plant cold-tolerant annuals in containers as a brilliant welcome to spring up. Good flower choices include pansies, violas, English daisies, snapdragons and sweet alyssum. Prep any previously used containers by cleaning them completely using a solution of one part bleach to nine parts hot water. Fill your pots with a growing medium made especially for container gardens, a that’s lightweight and well draining yet moisture retentive.

Liquidscapes

Cut back woody perennials and subshrubs to over a couple inches of the ground. These include: Russian sage (Perovskia atriplicifolia), Powis Castle sage (Artemesia), bluemist spirea (Caryopteris spp), butterfly bush (Buddleia davidii), leadplant (Amorpha canescens), rabbitbrush (Chrysothamnus nauseosus) and St. John’s wort (Hypericum spp).

Amy Renea

Sow cool-season vegetable crops right into the ground when the soil temperature is at least 40 degrees Fahrenheit. Plant potatoes, peas, Swiss chard, kale, turnips, lettuce, lettuce, radishes, onions and lettuces. Keep frost blankets and cloches convenient to protect seedlings in the inevitable April snowstorms.

Your guide to developing spring edibles

Get your lawn off to a fantastic start.
Core aerate your yard before fertilizing it midmonth. Leave the plugs on the lawn to decompose and add nutrients to the soil.Overseed thin lawn areas having high-quality grass seed when the soil temperature reaches 40 degrees Fahrenheit. Rake the area to be seeded to expose the soil, then scatter the seeds in a compact, single coating. Cover the seeded areas using a scant 1/4 inch of compost and water thoroughly. Keep the area evenly moist until the seeds germinate. Note: Don’t use preemergent weed controls, such as corn gluten, in regions that have been recently seeded.Tune your lawn mower and sharpen the blades. Sharp blades not just make your task easier (especially if you’re using a push or reel mower), but a crisply cut blade of grass is not as susceptible to disease harm than one that is torn and ragged by a blunt mower.

Jocelyn H. Chilvers

Install plant affirms — such as circular cages, loop bets and grow-through grids — to support tall, floriferous perennials as soon as they come into blossom. Placing supports today will permit the plant to grow into and throughout the structure having a more natural appearance. Peonies, catmint (Nepeta spp), baby’s breath, delphiniums and tall types of yarrow (Achillea spp) are all great candidates for assistance.

More regional gardening guides

See related

How Long Can Bulbs Live from the Ground?

It happens to the best of gardeners — while spring cleaning in the garage, you discover a bag of unplanted bulbs. Unlike seeds, a few of which can continue indefinitely, bulbs are living plants, and therefore, they can not live eternally from the ground. But exactly how much time a bulb can live depends in large part on the type of bulb and the way it’s been stored.

Prepared to Boost

Curled up inside every bulb is a flower waiting to grow. When the timing is appropriate — following the chilling period, once the bulb feels the warm, moist soil — the bulb will sprout along with the flower will grow. In the meantime, the bulb waits, but it won’t wait forever. Most don’t last more than a year from the earth, and only if they are stored properly, although this may vary by species. Generally, flower bulbs rot should youn’t get them in the ground soon enough. Because of this, flower bulbs must be planted as soon as possible.

Better Late Than Wait

If you order spring-blooming bulbs and they arrive after the ground has frozen, plant them anyhow — use your own muscles and function that hard ground. The exact same holds true for late-arriving summer-blooming bulbs: It’s better to plant them straight away than to try to hold them over until next year. Your chances of getting the lights to bloom are much better when you plant overdue. If you just can not get them in the ground, then dust off a few pots to fill with rich potting soil and plant the bulbs in the containers. Be certain the pots have sufficient drainagewater and water the soil . Store the containers in a spot where temperatures average around 40 degrees Fahrenheit.

Longest Survivors

Generally, spring-blooming bulbs are the hardiest, therefore they have the best chance of living the longest from the ground. Still, you need to be discerning. If you’ve discovered a box of old bulbs, or have been given some by somebody with great intentions, thank them politely and then set about separating the good from the evil. Healthy flower bulbs are firm and plump. Any wax which feels soft or contains mushy spots is probably suffering from decay and needs to be discarded. The exact same is true for bulbs which are cracked and dry, shedding scales or falling apart.

Storage Tips

Sometimes it’s just not possible to find the bulbs in the ground in a timely manner. If so, you need to store them correctly. Flower bulbs should be stored in a cool, dry, dark place. Particular storage temperatures vary depending on the type of wax, however generally speaking, non-tropical bulbs must be stored where the temperatures are consistently between 35 and 45 degrees F. Tropical bulbs can be stored in slightly warmer temperatures.

See related

Great Design Plant: Rocky Mountain Zinnia Brightens Hot, Dry Spots

If you are struggling with a hot and dry area that requires a major dose of color, Rocky Mountain zinnia can come to the rescue! This long-blooming perennial is a rugged native located in the arid slopes and mesas of the southwestern U.S., but is sorely underused in garden settings.

Jocelyn H. Chilvers

Botanical name:Zinnia grandiflora
Common names: Rocky Mountain zinnia, prairie zinnia, desert zinnia
Origin: Native to the southwestern United States, Mexico and Central America
Where it will grow: Hardy to -30 degrees (USDA climate zones 4 to 7; locate your zone)
Elevation range: 4,000 to 6,000 ft
Water requirement: Very low
Light requirement: Total sun
Mature size: 6 to 8 inches tall and 10 to 15 inches broad
advantages and tolerances: long blooming — June to freeze; very drought and heat tolerant; deer and rabbit resistant
When to plant: Spring
Seasonal curiosity: Rocky Mountain zinnia flowers prolifically from June to frost (the photographs here were taken from early July and early September).

Jocelyn H. Chilvers

Jocelyn H. Chilvers

Distinguishing attributes. The 1-inch-diameter blossoms feature bright, golden-yellow petals and dark orange anthers. The foliage is nice, with needle-like leaves in a cool blue-green colour.

The best way to use it. Plant Rocky Mountain zinnia as a showy drift of bright color in prairie gardens, xeriscape gardens and desert gardens. Blend it with drought-tolerant, short, native grasses, like blue gramma grass (Bouteloua gracilis, USDA zones 3 to 10) and buffalo grass (Bucheloe dactyloides,zones 4 to 9), and wildflowers like purple prairie clover (Dalea purpureum, zones 3 to 9), wild four o’clock (Mirabilis multiflorus, zones 4 to 8) and orange butterfly weed (Asclepias tuberosa, zones 4 to 9).

A high drought tolerance and nice foliage feel also make Rocky Mountain zinnia an perfect foil for rocky plants like Yucca spp (as shown here), Hesperaloe spp, Agave spp and cacti.

Jocelyn H. Chilvers

Planting notes. Rocky Mountain zinnia demands well-drained soil — sand or sterile clay — and a bright website. Water young crops to establish the root system, then decrease or remove water altogether. (Mature plants will endure with 6 to 8 inches of water each year.)

The plant tends to gradually spread through rhizomes (specialized underground stems) to form a massing earth cover. It may also spread by seed; deadhead the flowers at the end of the growing season to control dispersing if necessary.

Notice that the crops are extremely late to break dormancy and won’t show in the garden before the soil warms up in spring or early summer.

More: What to Do in Your Garden Now

See related

Fantastic Design Plant: Culver's Root

I started using Culver’s root for kicks. Thanks to its candelabra blooms loved by butterflies, good yellow fall colour and carefree growing, I have come to love this Midwest native and think about it a basic design plant. Leave this up through winter to give your garden a exceptional appearance; it also shelters winter birds and gives you seeds to glow readily at any time.

Benjamin Vogt / Monarch Gardens

Botanical name: Veronicastrum virginicum
Common name: Culver’s origin
Resource: Eastern Plains (Missouri River), northern Midwest and eastern Midwest to New England
USDA zones: 3 to 2 (find your zone)
Water requirement: Wet into medium-wet dirt
Light requirement: Full sun
Mature size: Slowly spreading clump to several feet broad; 4 to 5 feet tall
Gains: Insect magnet; exceptional spiked shape
Seasonal curiosity: Long blooming in midsummer; seems architectural in winter
When to plant: Spring to fall

Benjamin Vogt / Monarch Gardens

Distinguishing traits. It is a spooky plant in fall and winter. Culver’s root may be pecked at by birds on snowy afternoons and holds up amazing to powerful plains winds.

As the story goes, an early American physician found laxative properties in the plant. Do with that information what you will, but you understand why it is named Culver’s root and not Poopy Pants root.

Benjamin Vogt / Monarch Gardens

How to use it. Culver’s origin is excellent for a rain garden or some other low area in your landscape. Put it at the middle for a effect or in the back of a mattress.

Planting notes.
Butterflies, moths and bees swarm to blooms which look amazing during full moons. This really is an interesting easy and well-behaved Midwest which everyone should try. Dig it at any time, from early spring into late fall — even in winter in the event that you put several inches of compost on top. Scatter the seeds over bare soil in spring and you ought to get seedlings, too.

More about attracting butterflies and birds

See related

Pacific Northwest Gardener's November Checklist

November is the final month to prepare the garden for winter. It’s rather like tucking kids into bed at night: They’ve played all day, and now they’re tired. There is the bath-time ritual, followed by a quiet story before they float beneath the quilt for many blissful hours of relaxation — for both of you personally.

The backyard has been playing hard and growing for more than eight months. Now it’s time to have it clean and tidy until its winter break. Only a few hours spent in the garden this month will make certain you equally reach spring with renewed vigor and enthusiasm.

Le jardinet

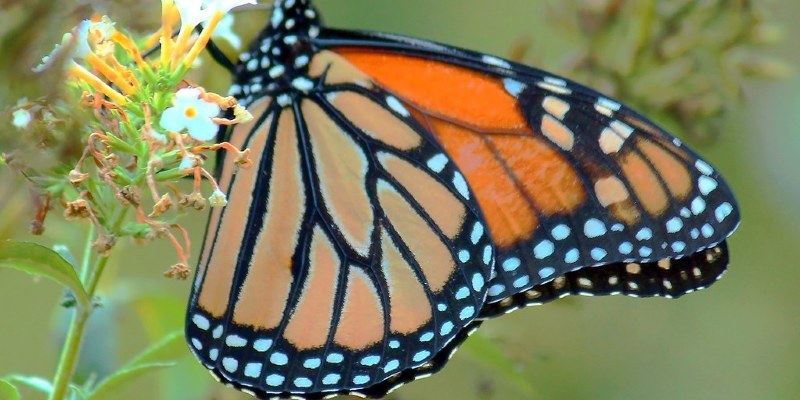
Keep gathering those leaves. One of the gorgeous aspects of fall is that the wonderful tapestry of autumn leaves is woven over a span of many months. Shades of crimson, amber and gold come and go as each tree and shrub requires its turn in the spotlight. For all of us, but it means that only when we thought we had finished sweeping up leaves, we must begin all over again. Consider it your November work out, grab your roster and gather nature’s black gold just as you did a month.

Jocelyn H. Chilvers

You’ve got many options: Insert leaves to your compost bin, then shred them with the mower and reapply them to a shrub edge as winter mulch or subtly corral them into a wire cage somewhere handy so you can spread them next year when they’ve decomposed into rich, dark mulch.

AW POTTERY

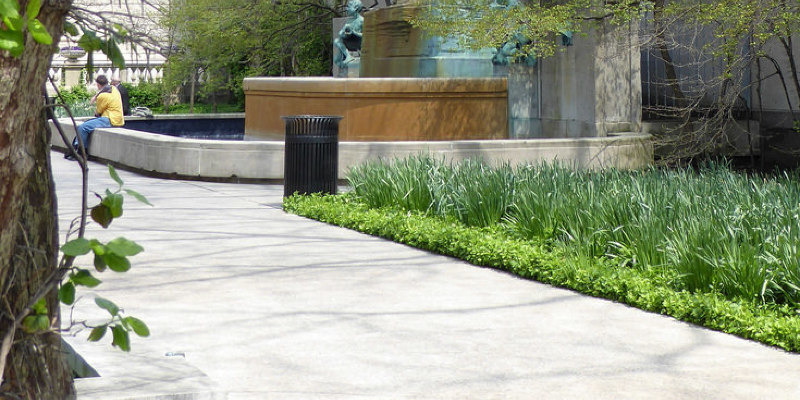
Protect your water features. A number of us are procrastinators, and some of us are just plain forgetful. This photograph shows what happens to fountains during a hard freeze either way.

To avoid creating such dramatic ice sculptures, remember to drain tiny fountains and either store them in the garage for winter or pay them to avoid water freezing and entering. Small submersible pumps will also be best removed and kept indoors until spring.

The Pond Pros Of Southern California

Larger ponds and waterfalls may have a sufficient volume of water cascading through them which the entire body of water won’t freeze, and the pump is either too deep to be affected or is in a secure enclosure aboveground. If you are uncertain, contact your regional pond supply firm for advice.

Jocelyn H. Chilvers

This is also the time to winterize your irrigation method. We utilize a very simple drip watering system for many of our containers in addition to for our vegetable garden. The hoses can be left in position, but we disconnect the battery-operated timers and bring them inside for the winter.

Landscape irrigation firms usually offer you a winter service to empty the lines if needed — contact them now.

Margie Grace – Grace Design Associates

Take care of your roses. Traditionally, rose pruning is performed in early to mid-February, but I also like to do a mini prune at this time of year — especially to taller roses.

I eliminate as much as a quarter of this rose height to prevent”wind rock.” In exposed areas taller roses can be vulnerable to being pushed around by strong winter storms, creating huge gaps in the soil level, which can then enable freezing rain, ice and snow to reach the roots. Lowering the height of the roses a little can prevent this.

Do not worry about cutting to an outward-facing marijuana, as you’ll be pruning correctly in spring.

Carolyn Chadwick

I also apply several inches of good compost around the base of the roses as a winter blanket, not to be eliminated until the next growing season.

FRONTGATE

simplehuman Stainless Steel Compost Pail – $59.50

Insert a few inches of compost. I’m a lazy gardener. If I apply compost to the garden today, the rains will help its nutrients leach into the soil, and the worms will till it while I’m nice and comfy indoors. Some gardeners prefer to mulch in spring. If your garden soil is in poor shape, I recommend adding compost in both autumn and spring for three decades and then once a year after that. Both seasons have their own pros and cons, so make it work for your schedule — just do it!

An appealing compost pail, like this one, will place food scraps to good use and lessen the number of treks out to the backyard compost bin.

Grow hardy edibles. It’s very satisfying to collect your vegetables in winter. Leeks, parsnips, cabbage, kohl rabi and Brussels sprouts are simply a few of the simple cool-season crops that could withstand winter chills. Provide a layer of floating row cover or a cold frame, and your options expand to add carrots, lettuce and much more.

Le jardinet

If that seems like too much work, at least maintain an herb pot by the back door so it is possible to add some fresh parsley or rosemary to match your winter dishes.

Le jardinet

Set up a container garden. Together with the scents of hot apple cider and homemade pumpkin pie wafting through your house, you know it won’t be long before friends and neighbors stop by. Welcome them with a vibrant container garden in your porch or patio.

It’s simple to spruce up existing plantings by tucking into a vibrant pumpkin or seasonal accent one of the foliage.

Terra Nova® Nurseries, Inc

Starting from scratch? Look for warm-colored foliage — coral bells (Heuchera) are a great choice and come in a number of colours, from lime to mahogany, because you can see in this photo.

Among my current favorites is ‘Delta Dawn’ (centre ), which is a wonderful colour of buttery yellow accented with rosy hues.

Le jardinet

The fall fern (Dryopteris erythrosora) is just another mainstay for autumn, using its fronds turning to shades of copper as temperatures drop.

To get just a little pizzazz, ‘Goshiki’ false holly (Osmanthus heterophyllus‘Goshiki’), shown here, can be depended on for good color in sun or partial shade. Its holly-shaped green and yellow variegated foliage partners well with vivid gold conifers and vibrant heathers.

Le jardinet

Become a kid again. I visited a pumpkin farm last weekend. I felt a bit silly really. There were all these young families with excited toddlers on a treasure hunt to find the perfect pumpkin to carve, tottering through the rustling corn maze and playing on the old tractors. I began to wonder whom I could”borrow” a kid from!

But of course you are so old as you feel. So you’ll find me crawling through the gourd tunnels, looking for the wartiest pumpkin and kicking through the leaves with the kids.

Fall is for pleasure — have a superb month.

More guides to Pacific Northwest gardening | Locate your U.S. garden checklist

See related

Great Design Plant: Donkey Spurge

Donkey Spurge is not the nicest of titles, but the plant is quite pretty in its own quirky way. It’s a wonderful gray-green, with a lovely blue tint that combines with everything. The surprise in spring is the lime-green shirts that celebrate new expansion as well as any spring tulip.

Join me as we discover this wonderful plant that’s been saddled with such a poor name and try to give a little more credit where credit is due.

Caution: When the plant has been broken, its milky white sap may cause a rash somewhat like poison ivy. Keep children and pets away and use gloves when coping with it try not to break the stems.

Dig Your Garden Landscape Design

Botanical name: Euphorbia myrsinites
Common name: Donkey Spurge
USDA zones: 5 to 9 (find your zone)
Water necessity: Low; requires good drainage
Sun necessity: Full sun to light shade
Mature size: 14 inches high and 12 inches wide
Development rate: Moderate
When to plant: Spurge is tough, so it may be transplanted at any given time of year. I love to transplant it in early fall, so it can get established in time to put on new new expansion by spring.
Advantages and tolerances: Drought tolerant; spring color; blue foliage
Cautions: The sap may cause skin irritation and be toxic if ingested. Donkey Spurge is considered invasive throughout many nations in the American West.

Amy Renea

Spurge also makes a great indoor plant over winter, as long as it is kept out of reach of children and pets. Try it in a hanging basket.

Verdance Landscape Design

The best way to use it. Spurge’s blue color (far left) is just beautiful in almost any garden and is a fantastic counterpoint to the masses of all green plants in a traditional cottage garden.

Amy Renea

I used spurge in this enjoyable and unique hamster wheel, but unlike thicker succulents, spurge lasts just a few weeks within an arrangement.

Amy Renea

Spilling over the edges, spurge creates a great waterfall or tracking plant for any bud or structure.

Amy Renea

Please do not plant spurge in the West, where it is invasive, but do consider it for different gardens to get a shot of quirky motion, a bit of blue along with an excellent show every spring. It’s a wonderful plant worth researching, although it may be known as Donkey Spurge.

See related

Cool-Season Vegetables: How To Grow Leeks

These tall, stately onion relatives are known for their function in soups, but savvy cooks add them to other dishes too. They’re handsome plants that are worth raising in your autumn or spring garden, but plan your own garden area with them in mind. They take at least 90 days to grow, and that’s just for the baby leeks; otherwise you’re looking at four months to more than half of the year. You’ll also need to always mound soil around them to keep the lower part of the stalk white. When you do harvest, then there’ll be a bare place in the backyard. But they love the cooler weather and also can deal with the cold.

More: The way to grow cool-season veggies

When to plant: due to the long growing season, beginning with seedlings is preferable. Should you want to increase leeks from seed, then start about six weeks sooner than you want to set them out. They are truly fall veggies when it comes to planting date. You can set them out on the first frost date in locations where summers are mild. Otherwise set out them in the autumn so they will be older in spring.

Days to maturity: 90 to more than 200

Light requirement: Complete sun, though needs some shade in very hot summers

Water necessity: Regular watering

Favorites: Bandit, Blue Solaise, Giant Musselburgh, King Richard, Varna

Planting and care:
Transplant seedlings into routine, rich ground about 5 inches deep and at least two feet apart (4 feet apart is likely better). Keep the soil consistently moist and fertilize it every couple weeks. Pests are rather infrequent, though you may have difficulties with thrips.

As the plants grow, mound soil around the bottoms to blanch the stalks. Keep the soil just under the leaf joints therefore it will not find its way into the shanks.

Harvest: If the stalks reach 1/2 inch two inches thick, then gently work them from the ground. You’ll probably need a spading fork, as they run deep. In mild-winter climates, you may set out successive plantings to continue harvesting through winter. In cold-winter climates, you’ll want to finish harvesting until the ground freezes.

More: How to Grow Taller in Spring and Fall

See related

Bahama Shutters Bring the Expression of This Tropics Home

Summer is heating up, and with the hot sunshine comes a demand for ventilation and shade. Installing tropical-inspired Bahama shutters is a great way to achieve a cool house in the summertime. Hung on the outside of your house in the peak of each window, Bahama shutters have an awning-like look that adds a distinctive tropical feel to a house.

Typically made out of stile and rail construction, Bahamas are a true louver camera design. The louvers welcome tropical breezes while providing shade and privacy (eliminating the requirement for interior window treatments). Many Bahama shutters have the added plus of being storm ranked. Code-compliant shutters are strong enough to shelter your house’s windows during hurricanes and other foul-weather bouts. Whether you are looking for shade, fashion or storm defense, the Bahama is the quintessential summertime season portrait.

Barefoot Design Group, LLC

Bahama shutters shield the dormer windows with this beachfront Antigua house. This is tropical living at its very best.

Sennikoff Architects, Inc..

Exterior wood shutters are usually made from naturally decay-resistant Western red cedar.

Summerour Architects

Bahama shutters are also appropriate on lakefront homes. This South Carolina house on The Reserve at Lake Keowee features Bahama shutters with centre stiles.

Applegate Tran Interiors

Bahama shutters can be utilized in Hawaii.

Ground-level Bahama shutters provide privacy from nosy neighbors in the Alys Beach, Florida, residence.

Clifford M. Scholz Architects Inc..

The beachy blue shutters with this Boca Grande, Florida, residence are rated.

Sennikoff Architects, Inc..

This two-story coastal tropical-style house in Orange County, California, features awning windows and Bahama shutters.

Tracery Interiors

Bahama shutters were a must with this coastal house in Port Aransas, Texas.

John McDonald Company

Bahama shutters and Chippendale balustrades combine to make a classic anglo-Caribbean house in Jupiter, Florida.

kelley gardner

While interior shutters don’t necessarily protect you from the elements, they really do encourage ventilation (much like the transom window).

Leaving your Bahama shutters wide open on summer nights permits for breezes to fulfill your property.

Tropical Windows

Storm-safe Bahama shutters without centre stiles are offered from Roll-a-way.

See related