What to Ask When Purchasing Faux Wood Blinds

Faux wood blinds, which imitate the natural warmth and glow of timber, are made of vinyl, plastic polymers or wood mixture. They have a lot of benefits over wood blinds in that they charge less, are longer-lasting and durable, are immune to heat and dampness, and won’t crack, split, warp or decay. An attractive addition to any house, you might wish to take into account a few factors before buying faux wood blinds to make certain they will meet your window-covering needs.

Window and Slat Size

The appropriate slat width is based on the size of the window and also the thickness of the window sill. Select 1/2- to 1-inch slats for smaller windows or for those mounted within narrow window frames. Choose 2- to 2 1/2-inch slats for medium to big windows to keep them from appearing disproportionate. Make sure slats will fit snugly in an inside mount, and use an external bracket to adapt wider slats. For big windows, multiple blinds must be mounted on one head rail to decrease strain.

Privacy, Light Control and Safety

Smaller slats block sunlight when they’re shut, but they might obstruct more of the view when they’re open. Broad forks are a much better option when an airy and open atmosphere is desired. Route-less or no-hole options eliminate cord holes and provide blinds better light and privacy controls. Fabric tapes also eliminate holes and add a decorative touch. Consider cordless lights or string cleats to decrease security risks to pets and children brought on by loose cords.

Layout, Theme and Colour

Faux wood blinds come in a diverse range of colors and textures that match any decor scheme. Select textured colors in earthy tones which resemble natural wood for a rustic appearance. Soft, warm colors and smooth slats utilize modern or traditional designs; lighter colors like creams and whites create a bright and airy Nation Cottage atmosphere. Try soft greens, greens, and tans with creamy whites or yellows to catch a soothing coastal ambiance.

Maintenance Options

Faux wood blinds are easy to care for and keep looking their best. Check the manufacturer’s directions before applying any products to wash out the slats. A moist cloth with warm water and a small quantity of a mild detergent like dish soap is generally enough to keep the slats and hardware clean. Use your vacuum cleaner’s brush attachment to remove dust and loose dirt. Avoid using synthetic sponges or cleansers because this might damage the synthetic wood surface and cause water to seep into the material.

See related

The Way to Replace Ceiling Registers

Ceiling registers are one of the home essentials which ignored and are often installed. But in case your registers have slowed, upgrading your registers, or when the time comes to remodel your house can improve the appearance of your house, with the added benefit of regularly improving your atmosphere. Whether you substitute registers with a layout that is very simple or decorative models, the look cans improve and texture of your area.

Eliminate using a ladder and an appropriate screwdriver to access the register, if needed. Be sure to wear safety goggles to guard your eyes whilst working around the ceiling away from falling debris.

Quantify the air duct and take note of the width and length dimensions. Don’t use the register for dimensions, to make sure that you are getting the most accurate measurement possible. Use this measurement when buying a register.

Drill a hole in the area indicated for the screwthread. Make sure that the hole is slightly smaller in dimension than the screws which you are using to attach the register but as long as the screws.

As you are screwing in the screws, tape the register to the ceiling using painter’s tape to hold the register set up. Alternately, have a helper hold the register set up.

Screw in the register screws using a power driver or manual . Eliminate the painter’s tape in the event that you used it.

See related

14 To-Dos to Make the Most of Summer

Creating a summer want-to-do list is a great way to make sure you make time for whatever you want to do prior to the year slips by. You can probably think of lots of things to add to your list that involve outings, such as spending the day at the beach, going to a baseball game, jumping in a lake or ingesting a lobster roll at your favorite clam shack — but what about entertaining things you can do without leaving home? Think about adding these 14 ideas.

Streeter & Associates, Inc..

1. Photograph your residence. Years from today, if you still reside in your home or have moved on to a different place, it can be rewarding to have a few mementos of your home life as it is today. Simply take a few shots of the exterior from throughout the street and each room inside, plus any particular details, such as your kids ‘ height marks on a door frame or the view from the favourite window.

See how to shoot better photos of your Property

Wettling Architects

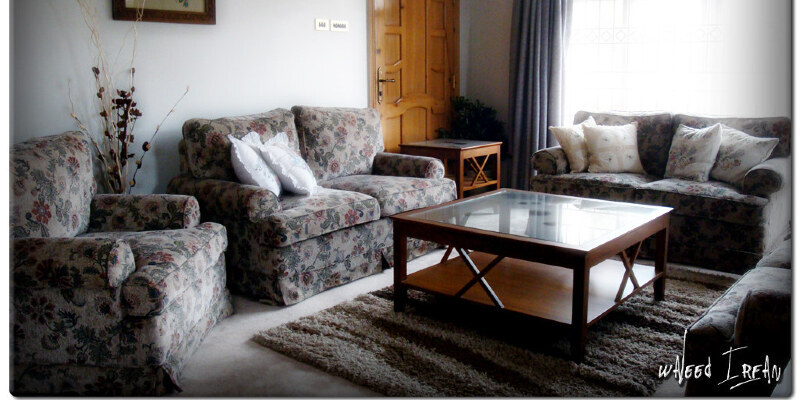
2. Set the stage for a staycation. A couple of days off at home in summer can be sweeter if you have taken the time to stock your home and patio with summer essentials. Clean up those deck chairs and treat yourself for a few fluffy new towels or cushions, a pile of books and your favorite icy drinks.

Find your summer patio design

Moving Home To Roost

3. String a hammock up . Just looking at a hammock swaying gently in the breeze is relaxing — really lounging in a single is even better! If you do not have a pergola to hang yours from, look for a hammock that accompanies its very own freestanding framework.

Annie McElwain Photography

4. Try out a fresh take on the guest book. Take a snapshot of each person who visits your home this summer, and tack all the photos up on your refrigerator or on a particular bulletin board. The growing jumble of photos will be like an ever-changing artwork display — and by the end of the summer, you’ll have enough to fill a record.

Carlos Delgado Architect

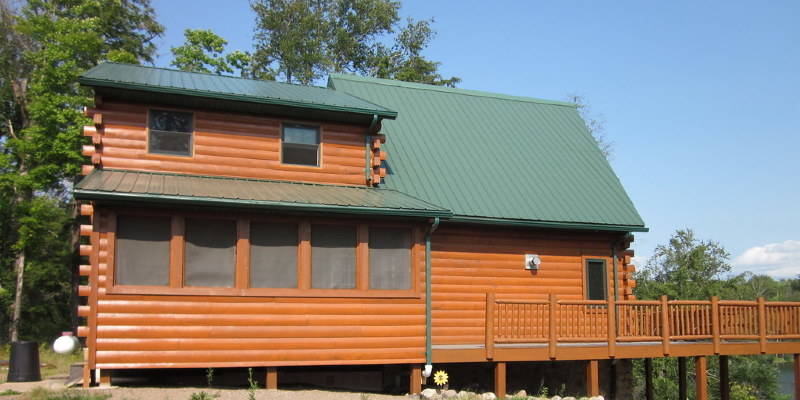
5. Add a summery exterior feature. An outdoor shower, pizza oven, fire pit, movie screen … any or all them can transform your outdoor space. And the beauty is, the majority of these jobs can be completed on many different budgets.

Clayton&Little Architects

6. Transform your garage or drop into usable space. Why let that garage or drop just sit, when it could be reimagined as an art studio, a workshop or a Ping-Pong room? Let your plans to your distance motivate you to have it cleared out and refreshed, so you can start enjoying it before the summer is over.

Dara Rosenfeld Design

7. Try out a nonlawn game. No lawn? Set up a game of bocce or pétanque on a gravel court or driveway.

Kristie Barnett, The Decorologist

8. Decorate with flea market finds. Freshen up your home on a budget by hunting at summer flea markets and yard sales for bargain finds. Spruce up your finds with a lick of paint or new knobs.

Get tips for creating your own classic style

Alex Amend Photography

9. Try out an upcycling project. Look at your cast-offs having an eye on repurposing, and you may be able to create something completely new without spending a dime. From the space shown here, an old boogie board tops a dining table, and camp blankets cover cushions and chairs. Start with materials you currently have and search for job ideas that appeal to you.

Step-by-step DIY jobs for indoors and out

Big Girls Small Kitchen

10. Preserve the harvest. The next time you come to a bounty of peak-of-season best create — if it’s from your own garden or a farm stand — get sufficient to place some by for later. Canning is a favorite alternative for keeping fruits, but when boiling jars isn’t your idea of fun on a hot summer day, consider freezing your haul instead. Just spread out berries or sliced peaches on a baking sheet and freeze them so that they do not stick together, then dump them into labeled freezer bags.

Annette Tatum

11. Camp out in the backyard. Preparing the tent, roasting s’mores over the fire pit and telling stories from the dark is equally entertaining for little ones if you are deep in the mountains or in your own backyard. In fact, even in the event that you don’t want to sleep outdoors, tents and tepees create great temporary summer playhouses for kids.

Simple to Beautiful Tepees and Tents

Alykhan Velji Design

12. Finally print all those pictures and set up a gallery wall. Ah, the electronic age. If you are anything like me, almost all of your photos exist only on your computer’s hard drive. Commit to making a change that summer by selecting your favorites to publish. Fill out an entire wall with frames for an enjoyable, eclectic look.

View gallery wall ideas for every character

SchappacherWhite Architecture D.P.C.

13. Take on a major remodeling job. In case you’ve been planning a kitchen remodeling job, summer can be a great time to dive in. After all, when else would setting up a temporary exterior kitchen really seem fun?

Justine Hand

14. Simplify … and then only unwind. Streamline your possessions and reduce clutter from your life to make more space for what you really want to do.

Take the first step into decluttering

Tell us : What is on your summer want-to-do list?

See related

The Way to Install a Shakespeare Brush Cutter

String trimmers will cut grass and milder substances — however if you would like something which can handle brush or a job that is more challenging, you might have chosen to install brush cutter blades on your routine trimmer. The Shakespeare brand brush cutter, offered by Yard Gear, is just one such heavy-duty cutter. The brush comes with bolts and nuts of different sizes, making it match on many distinct brands of trimmers.

Inspect the region near your current trimmer head, searching for a hole in. That hole is a feature which allows you to lock the trimmer shaft in place and unscrew the trimmer head. You’re going to require a set of pliers rather if you do not have a hole.

Insert a screwdriver into the pit if you have a hole, then turn the trimmer head to the left to loosen it and remove it. If you do not have that hole, wrap a pliers round the trimmer shaft underneath the trimmer head, as the trimmer head turns to the left to unscrew it and maintain the pliers tight. It has a extension screwed onto it ; turn that bolt extension to the left to remove it, showing a shorter shaft underneath if the shaft under the mind is about 1 inch.

Wear a pair of leather work gloves and maintain them on. The brush cutter’s blades can be really sharp and could cut you if you’re not careful.

Test the nuts that came to see which one fits by threading the nut on the shaft and deciding which one threads on with the match.

Set the end of the properly sized nut at the center of the brush into the hole, called the hex cavity.

Press the nut into the hex cavity with your pointer finger as the brush head turns onto the threads of your trimmer shaft. While you do this the trimmer shaft needs to be secured down, so at precisely the same time, you will need to have that screwdriver inserted to stabilize it, or you’ll have to grip the shaft still.

Look for any openings involving the trimmer and the brush head, on the trimmer head. If you find a gap, unscrew the brush head before replacing the brush head once 29, and insert one of the supplied washers. According to Yard Gear, you should use the supplied 1/4-inch washer for Stihl and Husqvarna brand trimmers. If there is still a lot of room there after installing the washer, add the supplied”adapter cup” to the shaft and then screw on the brush cutter. Ensure that the brush head is tightened to keep it.

See related

How to Install an Oval Drop

There can be A bathroom remodeling project a worthy investment in your home’s worth. While altering the room is a large undertaking, an instantaneous style boost can be provided by a project such as altering the size and shape of the toilet sink in the vanity. Money and the time involved is a portion of a renovation, as if you spent a lot of money, however a fresh drop-in toilet sink with new fixtures can make your bathroom look. You can alter the form of the opening to accommodate the oval toilet sink, if your vanity top is laminate.

Remove the Old Sink

Switch off the water under the sink at the valves. Turn the water off to the house, if your toilet does not have shut-off valves. Turn the taps on to run out any water that stays from the water line.

Loosen the nut which retains the P-trap set up on the drain. Loosen the nuts which hold the water distribution lines set up.

Twist the edge of the edge of the sink and a putty knife between the countertop to break the seal which holds it in place. Pull on the sink from the vanity cabinet’s cover and set it apart.

Scrape any silicone which stays around the opening in the sink.

Center the template for the oval sink above the opening in the countertop. Put masking tape. Tape the template set up over the tape line with tape. Trace the template onto the tape’s outline.

Cut out the form of this sink with a jigsaw. Based on how much you’ll cut off to make the new launching, you might need to drill a starter hole with a drill bit. Insert the jigsaw blade and cut along the line. Hold your hand beneath the countertop as you cut the last side of the sink so that the cut piece does not fall and cause the laminate.

Install Sink Fixtures

Attach new distribution lines. Tighten the nuts by hand, then turn one-quarter turn with a set of pliers.

Put a bead of plumber’s putty around the exterior edge of the sink fixture’s putty plate. Center that the putty plate from the assembly kit above the holes in the sink with the putty against the sink of the sink fixture. Cover the putty plate with all the deck plate.

Set the faucet. Use nut and the metal washer out of the assembly kit to fasten the faucet beneath the sink. Tighten the nut with a slip nut wrench, but don’t overtighten it.

Roll plumber’s putty into a rope. Blend it. The drain flange through the opening, securing the flange. Wipe off any excess putty. Attach into the underside of the drain flange from the assembly kit and tighten it with the slip nut wrench.

Wrap plumber’s tape around the threads onto the drain flange. Twist the pipe. Take care to orient the lever into the back of the sink.

Follow the manufacturer’s instructions and join the pop-up lever. Installation instructions vary among sink fixtures and manufacturers. Verify that the drain stopper and the turn functions.

Set the Oval Sink from the Countertop

Run a bead of silicone caulking around the outer edge of the container opening. Twist the pipe into the opening to the P-trap as you set the sink. Press the sink securely.

The slip nut over the P-trap to link the drain. Fasten the ends of the warm and cold water supply lines into the valves beneath the dressing table. Tighten the nuts and turn the nuts one-quarter turn with a set of pliers.

Turn the water on to the sink. Check for leaks. Tighten leaking connections no more than one-quarter turn if necessary.

See related

How to Add a Drain Extension to a Washing Machine

Drain hose extensions for washing machines have been set up once a drain standpipe — the right tube located at the end of the hose — is 5 feet or greater above the floor after the washing machine has been installed in the home. Adding a drain nozzle extension prevents water flows and ensures your washing machine satisfactorily drains after usage.

Unplug the washing machine in the electrical socket. Turn off the water supply into the sink or drain socket that’s attached into the washing machine. Laundry sinks normally have shutoff valves on the pipes that allow you to switch off the water supply directly at the sink.

Carefully pull out your washing system so you can access behind it, as it is the point where the hose is located. Remove the screws that hold the nozzle clamp into the washer casing with a screwdriver. Place a bucket underneath the washing machine hose to catch any water that can still be from the hose. Remove and the hose clamp. Use a clean cloth to wipe the hose vent and remove any lint or debris that could be in it.

Insert the extension drain hose. Push the drain hose clamp down and snap it in place on the first groove of this hose ribbing. Gently insert the hose clamp and drain hose to the hose vent on the back of the washer to make certain that it creates a seal. Reattach the clamp.

Route the washer hose to your sink or drain socket. Place a laundry drain hose crook within the sink border and insert the nozzle. So it’s 18 inches above floor level, position the drain hose standpipe end into the sink.

Use plastic ties to secure the drain hose and drain hose standpipe into the drain hose crook. If your laundry sink is a bathtub with feet, use a plastic tie to attach the hose into a leg of this bathtub.

Turn on the water supply into the laundry sink or drain socket and plug in the washing machine to the electrical socket. Run your washing machine through a washing cycle and monitor the hose for leaks. If you find a leak at the back of the machine at the hose connections, remove the hose and drain clamp and reinstall it, as it may not be completely seated at the hose port of this machine.

See related

Home Warranty Definition

Here is an all too common situation for a new homeowner. A couple of weeks ago, you bought a house that you had inspected before purchase. The home is in good shape, however there are a couple of items . In the middle of a summer night, your air conditioning stops on you. Or your furnace stops on the coldest day of this year. Or your water heater bursts and floods your garage. These scenarios that are common may result in costly repairs, but not if you’ve got a house warranty.

Identification

A home warranty is a policy a homeowner, seller or purchaser buys to cover the unexpected replacement or repair of the major systems, components and appliances in a house. The price runs anywhere from $200 to 600, according to MSN Money, and covers any procedures, components and appliances that are in the house if the policy takes effect. The coverage lasts from a few decades, depending upon the guarantee company, and is renewable. It doesn’t need to be revived by precisely the exact same individual who purchased it. For instance, a seller may purchase the original policy, however the new homeowner may renew it.

Features

Important systems include plumbing, heating and air conditioning and electric. Components can consist of compressors furnaces and water heaters. Covered appliances typically consist of garage door openers, stoves/ovens, refrigerators, washers and dryers, built-in microwaves and dishwashers. Businesses will cover items, such as pools systems and roofs , for an additional price. Covered items must maintain functional working order once the policy starts, and the homeowner should do appropriate maintenance on the items for the coverage to stay legitimate. Before purchasing a policy, read it to be sure that it correctly covers the items in your house and that you are familiar with any exclusions or conditions to the policy.

Types

Home warranties are offered for small homes, homes, condominiums and manufactured homes. They aren’t readily available for flats. The policy ties to the residence, not the purchaser, so if a vendor sells his house he cannot take the guarantee together with him. He would need to obtain another policy for that house.

Function

When a covered item breaks or stops functioning, the homeowner should call the warranty company and file a claim. The company will send out among its local contractors that are qualified to inspect the issue and make repairs. In case the issue item is irreparable, the company will authorize replacement or send the homeowner a check to cover the item. The contractor is paid by the company directly, and the homeowner pays a small service call fee, which discourages the misuse of asserts calls.

Factors

Most home guarantees are bought during purchase and sale transactions. Sellers may decide to obtain a policy in their house on listing so as to keep down sudden costs or at closing to the new purchaser. This may be an enticement for buyers, especially in locations where resale homes are competing with brand new homes. Buyers frequently choose to ask for a house warranty in their new home supply to prevent unexpected surprises whenever they’re making purchases for their new home. But a home warranty purchase doesn’t need to take place in conjunction with a sale–any homeowner could purchase one at any moment.

See related

Homeowners Insurance Limits

Homeowners insurance is vital protection: It offers liability protection if someone has an accident on your property and sues you, in addition to hazard insurance to repair your home and personal property if they are damaged. Your coverage is not a blank check, however; there are limits to just how much your insurance company will cover, and limits to what the policy covers.

Types

HO-3, which offers protection against 16 named perils, is your standard homeowners policy and the one that you’re most likely to have, the Insure site states. In case you’ve got one of those elderly, HO-1 and HO-2 policies, you won’t have exactly the exact same amount of security. The Federal Citizen Information Center recommends checking and upgrading to HO-3 if this is the case.

Benefits

The conventional HO-3 pays court costs and medical bills if anyone sues you over an crash. It also protects your house and its contents from damage from a list of sources including theft, vandalism, fire, lava, smoke, lightning, wind, falling objects and damage from aircraft or vehicles. Most policies do not protect against flooding, earthquakes or forest fires, and you’ll need a rider or another policy if you believe those might be a serious threat.

Size

If you take a $150,000 replacement-value policy, then the FCIC states, that will pay for the cost of rebuilding your house up to the coverage limit. In case you’ve got a cash-value coverage, then that is only going to cover the initial price of your residence or your roofing, which is then depreciated for the years it has been in place. Most policies will monitor inflation–as the price of construction materials rises, so will the limitation –but you may like a guaranteed replacement or extended-replacement coverage, which pays replacement costs even if they are above the policy limit.

Caution

If your house is damaged over 50 per cent, most communities will need you rebuild it to meet current building codes. In case you’ve got an older home constructed into an older standard, bringing it up to date will be more expensive than replacing it exactly as it was, and lots of policies won’t cover that. “Code compliance” exemptions, according to the Macero and Associates law firm, specifically state that the coverage won’t cover to make the building better than it was, even if the law won’t allow you to rebuild it otherwise.

Considerations

Your homeowners policy must provide some automatic coverage for the contents of your house–furniture, clothing, appliances–but there are limits to just how much your insurance company will cover on jewelry, artwork, collectibles or company gear if you’ve got a house office. If you need more coverage than the limit, cover to get a rider offering higher coverage for those items.

See related

Closing Charges on Refinanced Mortgages

A mortgage refinance may lower your interest payments and save you thousands of dollars. However, if you’re careless about the closing costs of your refinance, then you could have the best rates in the world and overpay on your mortgage. Refinance closing costs come in three main flavors: lender fees, third party fees and government fees. But if you listen to Elisabeth Leamy, consumer correspondent for ABC News, there are only two types:”actual fees that are inflated and junk fees that are just plain made up.” Of course, lenders do incur costs when processing a refinance, also it’s only right they pass on legitimate fees to the consumer. Learn which fees it is possible to prevent, which you can decrease, and that you just need to pay.

Bank Charges

Lender fees cover in house services that are expected to process a mortgage refinance. These include government fees, application fees, commitment fees, documentation preparation fees, funding fee, mortgage broker fees, processing fees, tax service fees, underwriting fees and others. Clearly, many of these fees stinks. Lenders, if pushed, can reduce or even waive these closing costs. View them as the initial price in a Turkish bazaar. You are expected to haggle. A commitment fee, for example, pays for the bank’s service of writing you a letter that guarantees you a loan later on. According to a nationwide closure costs research by Bankrate.com, devotion fees range from $450 to $100. This is expensive for the guarantee of a loan along with a letter. Request a waiver. For all lender fees, require a breakdown and request a waiver or reduction. You may save tens of thousands of dollars just by asking questions and being prepared to negotiate.

Third-Party Fees

Third-party fees cover services offered by other businesses, such as home evaluations and credit reports. There is not as much wriggle-room for negotiating with such costs since they are out-of-pocket costs for the lender. However, lenders can easily inflate these costs, so request receipts and attempt to negotiate every fee. For example, according to a poll by the U.S. Federal Reserve Board, survey fees for a $200,000 home range from $84 to $600. Evidently, it’s worth negotiating for a commission at the lower end of the range.

Government prices

Government fees differ from county to county. In some areas they are low, while in others they could represent a big chunk of your refinancing costs. Examples are recording fees, tax stamps and transfer fees. Some authorities don’t charge tax stamps and transfer fees on mortgage refinances. Contact your county office and ask what fees are relevant to your area. Government fees need to be paid; you can not prevent these costs.

No-Closing-Cost Mortgages

No-closing-cost mortgages are usually a misnomer. What lenders mean is you won’t have out-of-pocket expenses to cover prior to the mortgage is authorized. These costs are included either at the loan as a lump sum or paid through higher interest rates. Consult your lender for a cost comparison of their no-closing-cost refinances and conventional refinances. A higher rate of interest during the life span of a loan may cost you a whole lot more than the one-time closing costs of a conventional refinance.

Closing Expenses and Credit Scores

Just how much your lender is willing to negotiate on closing costs will often depend on your credit rating. Credit ratings are a score system lenders use to quantify your own vulnerability as a borrower. Your score is based on how regularly you pay your debts, how much you owe, beyond foreclosures or bankruptcies and other credit related events. Credit scores generally range from 350 to 850. The higher your credit score, the more attractive a customer you’re, which can determine just how willing lenders will be to negotiate closing costs.

See related

How to Contest Home Appraisals

According to figures from the National Taxpayers Union, an estimated 60 percent of U.S. properties are overvalued. This usually means the appraised price of the house exceeds the true value of the house. The outcome is a tax assessment higher than what it should be. Home owners, though, may contest the evaluated value of their houses by following the required steps.

Speak to your regional tax assessment office and inquire how property tax values are calculated by it. Obtain taxation rate or rates and the formula it uses it uses to figure taxation statements. The formula usually multiples the taxation rate by the appraised value of your house.

Ask the tax assessment office concerning the criteria used to figure the appraised price of a house. Ordinarily, square footage of the house and the value of similar properties in your area are utilized to establish the appraisal value.

Find a copy of the appraisal record to your house by rsquo & the assessor;s office.

Compute the appraised value of your house per square foot. This provides you a tool to use for comparisons.

Use real estate websites, real estate ads from the local newspaper and information from local property professionals to spot the selling price of houses in your area.

Identify properties from the home sales info. Comparable properties will be of a comparable course, size and age and will be in the exact same or a similar area.

Utilize the appraised value per square foot from your assessment to figure the assessed value of similar houses. If your calculations suggest that the appraised value is greater than the sale price for those houses, you get a fantastic argument that your home is overvalued.

Take photos of your house and similar homes used to determine that your assessment was too high.

Document your calculations and research and document a formal protest of the assessment with the tax assessment office. This protest normally requires you to complete paperwork, but a few assessment offices provide chances for meeting in person to challenge the assessment.

Wait to get feedback. After the assessment office considers your appeal, you’ll get a verdict.

See related