Tips for Renting a Storage Container

It’s more affordable to rent a storage container than to buy a new one. These days, there are several companies that offer landscapers Redding, CA for storage containers. But before you start looking for a container to rent, it is best to read the tips below in order to avoid making any costly mistakes.

Find Out if You Need to Obtain a Permit

Permitting requirements for a storage container will vary from one place to another. In most cases, however, you will only need to obtain a permit if the container will be used as a permanent structure within your property. Companies that offer rental services for storage containers should be familiar with the process of obtaining a permit, so if necessary, you better check with them.

Ask About the Delivery Fees

You may end up having to pay more for your storage container rental because of the delivery fee. That’s why it is best to ask for this in advance. The fee is usually based on the mileage, so the farther you are, the more expensive your delivery fee will be.

Decide How Long You Need the Container

Some suppliers can provide better rates if you lease the container for a long time. Others will also offer the rent to purchase option. If you don’t know how long you will need the container, it is best to opt for the month-to-month contract.

Figure Out What Size You Need

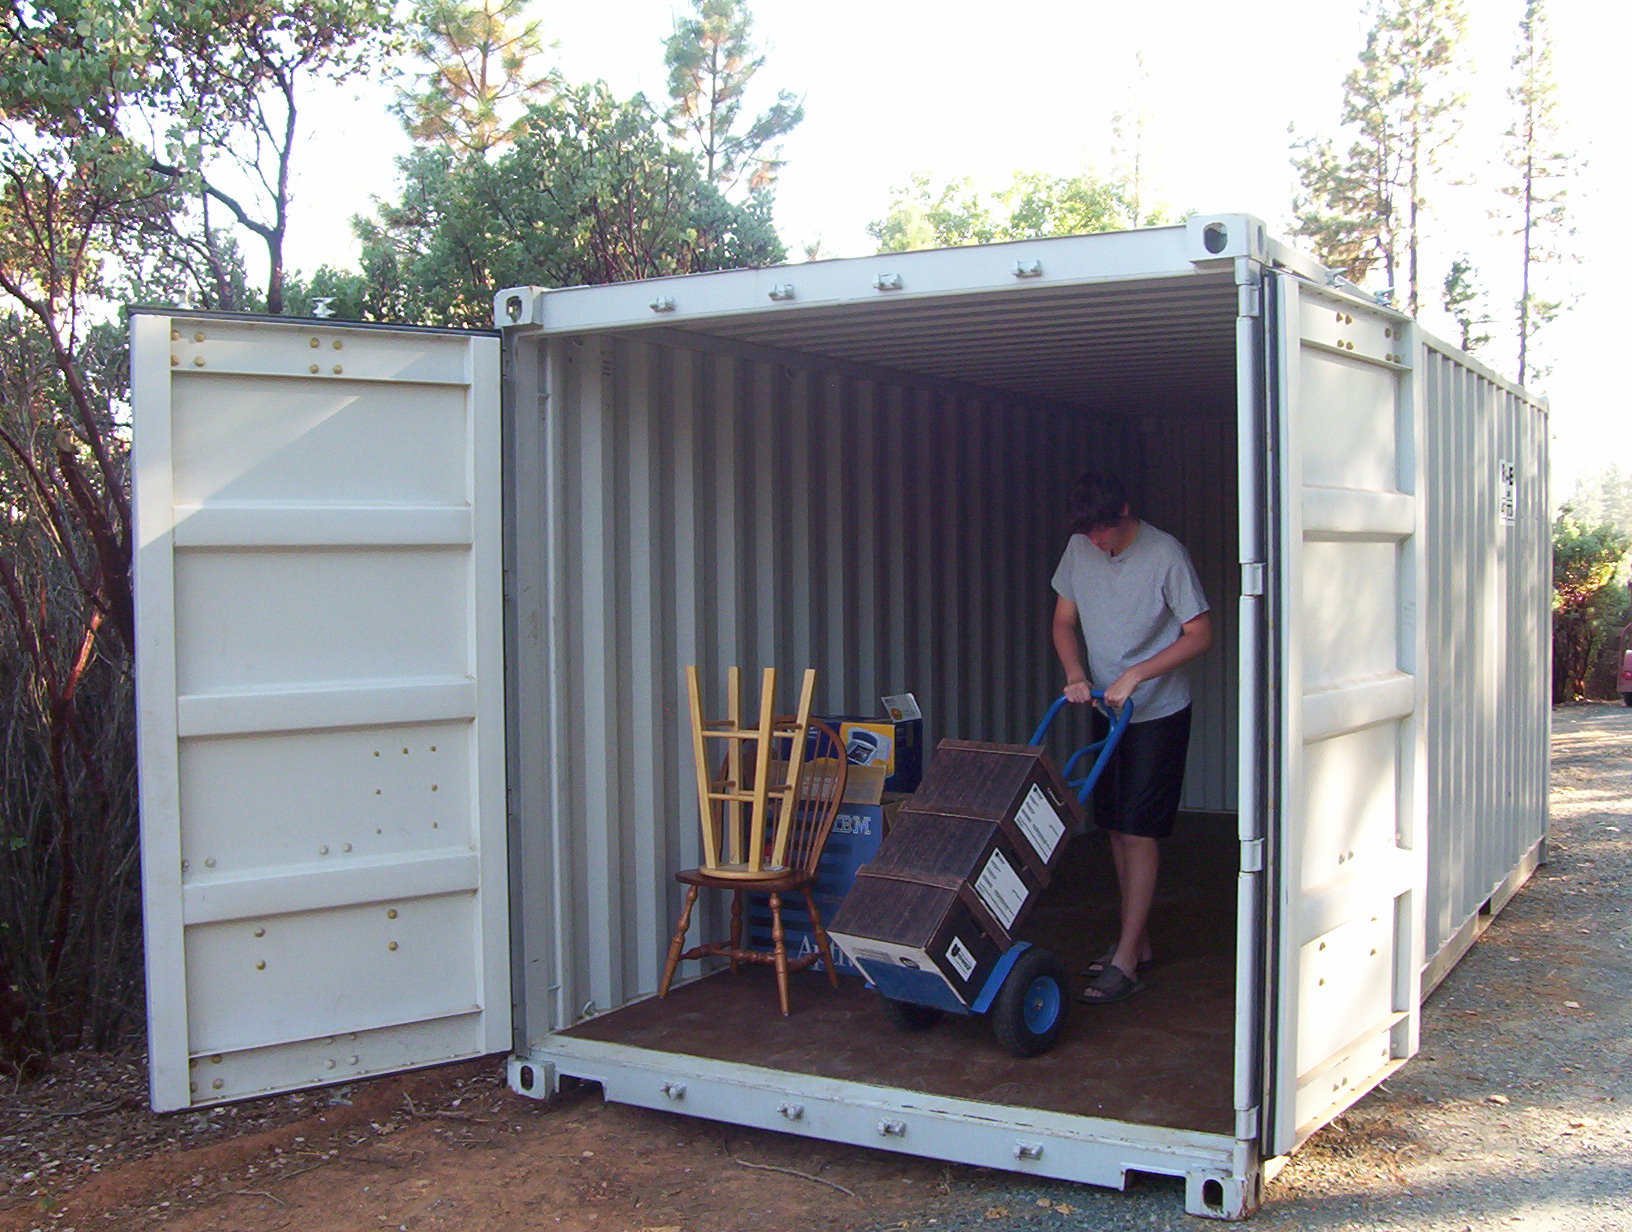
Storage containers are usually available in two standard lengths, the 40-footer and the 20-footer. However, there are also companies that offer landscape design Redding, CA for customized storage containers. These are containers that will be specially created for you, depending on your needs and preferences. Of course, customized containers will cost more than the standard ones.

Think of the Features

Storage containers are also equipped with a range of features. These are known as add-ons, which you can request to be included at an extra cost. Among these features are double entry doors, premium locking mechanism, storage and office combo etc.

Carefully Inspect the Container

Remember that not all storage containers are the same. It is therefore important that you carefully inspect the container before you sign the contract. Containers are used, so you can expect some wear and tear. Be wary of holes, severe rust, dents, chemicals etc.

Find Out What Site Prep Is Necessary Before Delivery

Sometimes, basic site preparation may be required before the container can be delivered to your property. If your area is relatively flat, there is no longer a need to level the ground. But if the area is hilly, muddy or rocky, then you may need to pay for the site preparation.

Check with Multiple Suppliers

As mentioned, there are now several companies that offer landscaping Redding, CA for storage containers. To ensure that you will get the best service, consider talking to a number of suppliers and request a quote before you make any decision.

The best way to Fix a Rusty Porcelain Sink

Rust stains on porcelain sinks are triggered by immediate experience of metal, like the metal bottom of shaving cream can, dripping taps, standing water or water that contains a large concentration of iron. When water comes in to contact with bedrock or soil that includes iron and filters throughout the floor, the mineral enters and dissolves the ground water, which can be used as drinking-water. Iron in water oxidizes and reacts with oxygen in the air. The iron is pulled by this chemical response from the water and turns it back back to a good form, which becomes a red- rust stain in your porcelain sink. Furthermore, harmless microorganisms that makes it rust and stain your porcelain sink and consumes iron may be current in the water.

Pumice Stick

Wet stick.

Rub it in a forth and straight back movement within the rust stains on the porcelain sink. As you scrub it the moist pumice will dissolve to to create a paste.

Rub the paste to the areas using the pumice scouring stick till they have been removed. Rinse all the paste from the sink.

White Vinegar

Plug the sink and spray it.

Let the vinegar sit to eliminate the rust stains.

Rinse the sink to remove the vinegar out.

Stubborn Rust Stains

Put on rubber gloves. Mix 2 tablespoons borax with 2 cups warm water in a bowl.

Use the borax solution using a clean cloth to the aspects of the sink.

Let the borax solution sit for 1-2 hrs in the sink. Rinse the sink with cool water to eliminate any residue out.

See related

The best way to Get the Appropriate Exterior Paints

Finding the exterior paint that is right to your home can appear challenging. While paint is created for stucco some paint operates on wood. You may want one having a pigment that is powerful therefore the colour will not fade rapidly, or you may be more worried about avoiding mildew. Break your painting priorities down to assist you select the exterior paint that is best for the house — then it is possible to keep your worrying for selecting the correct color.

The materials applied to the exterior of your house. Different components need paint that is particular. The the outside of your house could be one of one of the kinds of siding, wood or wood shingles, stucco or brick. Take that info along with you when purchasing exterior paint to ensure you get the best kind for the outside materials of your home.

Decide in the event the vibrant sunlight tends to fade your paint rapidly or in case your region has a dampness issue. While paint is manufactured to resist fading some exterior paint was created to avoid mildew buildup on the medial side of your home. Deciding what kind of defense your home wants most can assist you discover the exterior paint that is best.

Find out which type of paint is on the residence. Buy the sort of exterior paint you employed before. Like, in the event you’ve got latex paint acquire mo-Re latex paint to up date your appear. Should you not know what type of paint was applied to your residence formerly, purchase an alkyd-foundation paint, which can paint over alkyd or latex paints.

Buy that prime to exterior paints and paint in one-coat to create your work simpler. It’s possible for you to finish the work in one move, removing the need. Should you’d like to paint two coats for extra weather proofing and elevated color saturation, the two-in-one paint saves you from being forced to acquire individual primer.

See related

How to Run Power Anywhere

Not all the structures in your home have electricity running into them when you move in. There are some areas where you will need to make additional arrangements. Especially for areas like the shed or your garden, or in some cases, even the lamp post. To do this, you should make sure that the electrician Bakersfield wiring is done underground to the desired section, as safely as possible. This is a project that should be done with a rigid conduit and may cost anywhere between $100 and $500.

You will need the following tools for this project:

Wire cutter/stripper

Torpedo level

Tape measure

Spade

Pliers

Pipe wrenches

Hacksaw

Cordless drill or driver

Drill bit set

Screwdriver (4-in-1 preferable)

Drill bit 1 inch.

Leather gloves

Fish tape

Pipe bender

Mattock

Wire connectors

Switch

Stranded electrical wires

RMC (rigid metal conduit)

Metallic tubing

Tape

Duct seal

Conduit straps

Plan the Conduit Route

You should first map the path of the conduit. Get a mattock and dig a trench along the path. Use a spade to remove the sod strips carefully, so that it will be easier to set them back into position when you are done.

It is advisable to have a short path while at the same time considering the power outlet that you will use from the house. First, determine a feasible power source. This could be the ceiling box, the main panel or any other electricians in Bakersfield CA outlet. According to Code NEC, you should limit the number of bends you make in total to 360 degrees, so make sure you plan accordingly.

Mount the Metal Boxes and the LBs

The LB is a fitting where the rigid conduit enters from the ground. Make sure you mount the metal boxes to the LBs within the shed and the house. In case you are going to work all the way to the crawl space or the basement, the length of your conduit is not very important.

Run the Metal Conduit

Get the measurements from the end of the LB fitting to the trench and mark it on the conduit. The pipes have to be threaded together before connecting with a compression connector to the LB. To get accurate measurements, temporarily attach the LB to the shed and get the appropriate measurement between them. Do this until you have all the pipes in place. Attach the end of the conduit to the compression connector, and then use a wrench to tighten the compression nut.

Connect the Wires

Pass the fish tape through the conduit. Make sure the wires are looped properly and wrapped with Bakersfield electrician  tape. To make sure that the hook on the fish tape does not snag, wrap it too. For wrapping, you should use stranded wire instead of solid wire.

Push the fish tape through the conduit. Make sure there is enough wire on both ends to reach the metal box. According to the NEC standards, there has to be a way of disconnecting power at the point where it gets into the shed. Make sure you have this switch installed

For this project, an expert would charge you a few hundred dollars, without considering the cost of materials. However, if you do it on your own, it will not cost you more than $200, including the materials.

The best way to Run a Sump-Pump Outdoors

A sump-pump can perform a crucial part in safeguarding your basement from injury caused by water. The pump is activated when the water level in the sump pit reaches a certain peak, and drains the water from the sump pit. The water is carried by means of a pipe that passes through the wall outside your house. It is critical to to install the pipes so the water is carried from your house, and not just dumped next to it, when operating the sump-pump line outside. The water will flow back back to your house and over time, may damage your basis.

Measure the depth of the liner in the sump pit and cut a bit of schedule-40 PVC pipe which is longer in relation to the measurement. Use a hack saw to cut the pipe.

By screwing it onto the discharge port on the sump-pump connect a PVC male adapter. The discharge port is where the water flows to the drain line in the pump.

Apply PVC primer to the interior edge of one end of the pipe as well as the fringe of of the adapter and permit it to dry. Apply PVC cement to the places where the primer was used by you, and match the pipe on the adapter that is male. Hold the parts together firmly. Cement and the primer respond together with the the top of PVC, making it melt therefore the PVC parts fuse together when joined.

Strap the cord for the sump-pump with plastic ties to the medial side of the PVC pipe.

Place the sump-pump to the sump pit. Attach a check-valve to the conclusion of the PVC pipe that extends out of the pump using a hose clamp. The check-valve protects the motor of the pump from over-use by stopping water from flowing back through the pump, that causes causes the pump to to operate more frequently to the sump pit.

Measure and cut a portion of of routine-4-0 PVC pipe to to suit between the ceiling as well as the check-valve. Connect the pipe to the check-valve with a different hose clamp.

Drill a pilot hole using a quarter-inch drill-bit through the header joist where the drain line will ex IT your basement. The header joist is positioned along with the basis wall. Go outside to the area of the pilot hole.

Drill a-2-inch hole through the header joist having a holesaw. Center the hole-saw within the pilot hole. Go straight back to the basement.

Slide an item of PVC pipe. Glue a 90-diploma PVC elbow to the finish of the PVC pipe, utilizing cement and primer. Place the elbow alongside the pipe that runs to the ceiling in the sump pump. Produce a mark on the pipe that’s slightly more compared to bottom of the elbow.

Cut the pipe in the mark you produced together with the hacksaw. Glue elbow and the pipe using cement and primer.

Go to where the pipe extends in the wall outside. Produce a mark on the pipe in regards to a half-inch far from the house. Cut the pipe together with the hacksaw. Glue a 90-diploma PVC elbow to the finish of the pipe, together with the elbow pointing along in the bottom.

Dig a trench that runs from straight beneath the the PVC elbow to the area where you want the water in the sump pit to drain. You want to to perform the trench into a spot in your lawn that slopes a way out of your house to help with drainage. Dig the trench broad enough to retain the the pipe and 6″ deep.

Place a 90-diploma PVC elbow under the the elbow that’s attached to the pipe that extends from your wall immediately to the trench. Measure the distance involving both elbows, and reduce an item of PVC pipe to to suit between them.

Glue the 2nd elbow to another end of the pipe, along with the pipe to the finish of the PVC elbow that extends in the house.

Run PVC pipe to the contrary end of the trench in the elbow. If needed, connect diverse parts of of PVC pipe with PVC connector sleeves. Subsequent to the pipe continues to be installed backfill the trench.

Apply a bead of caulk across the pipe on either side of the header joist to stop water from leaking to the basement.

See related

Tips on How to Safely Clean a Flood-Damaged Home

Flooding is on top of the list when it comes to the most devastating and damaging things a homeowner can ever experience. There are lots of reasons why household flooding occurs including sewer back-up, burst pipes, malfunctioning sump pump, and heavy rains. Regardless of the cause, a homeowner must know what to do when a house gets flooded. water damage Glendale that’s done early will help in the reduction of the amount and extent of damage to the property.

Safety First

Your main priority when dealing with a flood-damaged home is to ensure your safety. When there’s flooding, you may be forced to evacuate. Before you decide to clean up your property, make sure that it’s safe to do so. The power must be shut down as electricity and water don’t mix.

Gloves, rubber boots, and other protective clothing must be worn before you re-enter your property. Expect to be dealing with water, including all those that the pool of water came in contact with like debris and sewage.

If you noticed that the flood water has reached your refrigerator and pantry cabinets, throw away any of the food that’s stored in them. Also, you have to wash your glasses, flatware, and dinnerware thoroughly as they might have been immersed in contaminated water. Obviously, any food that’s contaminated must never be eaten.

Water Removal

Water removal is an essential part of water damage restoration Glendale AZ. Before you remove the pool of water inside your home, you first need to block the water source. If your sump-pump malfunctioned or broke, replace it as it will help in keeping up with continuing rains. It will also prevent any further damage that may occur to your main floor, crawl space, garage or basement. There are times when seeking the help of authorities is the best move to take, especially when there’s a need to remove the debris stuck in storm drains. Your storm drains will help in stopping the flooding.

When you think you are ready to remove the flood water from your home, we recommend that you don’t use bins and buckets. Instead, use wet vacuums to suck out the remaining moisture and water from your floors and carpets. If you are lucky as the damage is only minimal, mopping the mess will be enough.

Call Your Insurance Company

A homeowner’s insurance varies depending on policies, but most insurance companies will cover flooding caused by storms, broken sump-pumps, burst pipes or backed-up storm drains and city sewers. Your insurance company will have an adjuster sent to your home to assess the damage. The sooner you contact your insurance company, the better so they can pay out faster if your damages and losses are covered.

Post-Flood Clean Up

After you’ve contacted your insurance company and the water is partially gone, it’s time to start the post-flood clean up. You can work on this process yourself or call in the experts. With post-flood care, you’ll be required to determine all the items that you can salvage as well as those that need to be thrown away. Be quick in cleaning up the entire flooded area in order to prevent the growth of mold and mildew.

DIY Clothes Dryer Repair Guide

It only takes an hour or less to fix common problems with your clothes dryer. Once you know what to do and you have the right equipment, it will be easy for you. In the rare event that your dryer breaks down completely, you might want to consider professional appliance repair Tuscaloosa. However, usually, you can solve the problem on your own.

While you may have to spend close to an hour on most repairs, you should also factor in the time needed to locate the parts and learn how to replace them. For this procedure, you will need to have a set of screwdrivers and a tester.

Disassembling the Dryer

You must remove the outer casing of the dryer before you begin any appliance repair Tuscaloosa AL. In case you have the lint filter inside the door, you must first unscrew the corners, and then turn the panel to gain access to the screws on the top side.

The process of disassembling the dryer usually depends on the type of dryer and the location of the lint filter. However, for conventional dryer repair mechanisms, you only have to remove the top cover. In most cases, you don’t have to remove the side or back cover to repair the dryer. To be safe, make sure you unplug the dryer from power before you begin. If you have a gas dryer, turn off the supply valve.

My Dryer is not Starting

The most common cause of a dryer not starting is the door switch wearing out. It can also happen because the plunger is damaged or is trapped in a bend. While normal wear and tear will affect the performance of door switches, if you continually slam the dryer door, you may cause extensive damage.

Check the plunger first. If there’s a need for a new one, get a replacement. In case the plunger is in good condition and the dryer is still not starting, you have to try and gain access to the door switch through the cabinet panel.

Make sure you test the switch to ensure power flows through it continuously, hence the need for a tester. In case the switch is just fine, you have to test the thermal fuse which is often located around the blower housing.

Dryer Making Weird Sounds

While in operation, you might notice a chirping, thumping or rumbling sound coming from your dryer. To eliminate these sounds, you might have to replace your dryer’s support rollers. According to the appliance repair Tuscaloosa experts, you should remove the roller. After that, use a rag dipped in alcohol to wipe clean the shaft, and then you can replace the old roller with a new one.

Never try to lubricate the shaft. If you realize that the support rollers have been worn out, you should replace all of them. Once you are done, pay attention to the dryer in operation again. If the noise is still there, you might have to get a new tensioner roller. Keep in mind that replacing rollers takes a shorter time than disassembling the dryer, so it’s advisable that you replace the rollers simultaneously.

The best way to Drill Faucet Cut-Outs in a Composite Sink

Composite sinks are a few of the finest alternative accessible that are sinks. Most of the time, they are able to be dropped in to a a basin that was typical with no fitting or little to be completed. This is ideal for just about any property on the industry that’s a sink that is missing, broken or damaged. The main function that that should be be completed is drilling the holes for the taps. But to make things more easy, most sinks have the particular holes of taps that are regular previously marked, making installation very simple.

Determine the keeping of the faucet. Modern faucet spreads are both 8″ or 4″, if you are mounting an faucet on the sink, but that may vary.

The faucet where you want it to sit, and mark where the holes will go. If required, use a marker. On the lower, a pilot hole will currently be marked on several contemporary sinks. This can help you save a step when the pilot hole markings are in the right place.

Drill a pilot hole through the middle of where the faucet hole is marked. Use a carbide- bit in a drill with this task. Drill in the underside up through the best. The velocity range can differ depending upon what kind of sink you’ve. Composites require so the plastic doesn’t melt during drilling, the bit to to operate at a pace. A drill pace that is quicker increases results like granite or quartz.

Attach the appropriate-sized carbide-tip holesaw to the drill chuck. A drill-bit employed to guide you in getting through the pilot hole can be suit past by the hole-saw. The hole-saw is measured as somewhat broader as opposed to faucet- water feed lines assembly brackets and/or that protrude through them.

Cut the holes from your top. Position the drillbit to the pilot hole. Cut through plastic having a slower velocity. You want to find out shavings without melting. Cut through rock composites with a quicker speed. Use a hand that is constant and enable the drillbit in the pilot hole to be your manual.

See related

The best way to Graft Pears

By understanding to produce cleft grafts that are dormant, it is possible to create custom-made pear trees. The process is the same whether European or Asian pears are grown by you. In case your developing area is restricted, try grafting scions of a pollinator selection onto your preferred fresh fruit-bearing selection – develop equally on one tree. Perhaps you’d like to try new types or include disease-resistant types for your home orchard. It’s possible for you to salvage a preferred older tree by grafting scions from it onto new root-stock, conserve an older, full size pear tree to develop in a smaller area by making semi-dwarf pear trees on quince rootstock, or graft scions of a preferred tree to consider beside one to a new house.

Select scions which are compatible with each other and that match and root-stock your area. Rootstocks from a business provider to get recognized illness and cultivars -free root methods. Gather scions from trees that bear the kind of pears by clipping branch ideas with hand pruners, you want to increase. The scions should be 12 to 18-inches long. Wrap the cut end of the scions in paper towels to keep them from becoming dry before the grafts are made by you. To disinfect the pruner blades between cuts, dip the blades right into a bucket of bleach solution created with 1 part liquid bleach and 9 parts water.

Shape the cut end of a scion right into a wedge. Working on table or a bench draw a knife or sharp knife around the cut end of a scion about one-inch over the finish to score the bark. Make an angled cut in the score line to the finish of the scion. Flip the scion and make a related cut that is angled on another side. The conclusion of the scion should now be “V”-shaped.

By putting the knife-blade on the most notable horizontal cut end-of the root-stock trunk prepare the root-stock. Press it into the trunk to create a slit about 1inch deep. You could possibly need to faucet on the blade having a hammer that is mild to begin the slit. Wiggle the knife a small to loosen the slit and abandon the blade in the slit to to put up it open.

Insert the “V” end-of the ready scion to the split up in the root-stock. As you slip the knife from the slit slide the scion over the knife-blade. A productive graft matches the levels of the wood in the root-stock using the corresponding levels on the scion. Visually examine the cambium levels, the layers that are greenish just underneath the bark. The cambium levels of the root-stock as well as the scion has to be aligned and be touching the graft will perhaps not be effective or to allow them to heal.

Wrap round the wound with nurseryman’s grafting tape to contain the the graft together. Make sure that the scion doesn’t slip from place as you tape. Advertise recovery and brush wound sealant to seal the cuts.

See related

4 Things To Know Before You Paint Your Front Door

If you want to do Little Rock handyman, there’s a way to go about it. You have to make sure you get it right because your front door is the first thing that people see when they come to your house. It does not matter whether you are just touching it up a bit or if you are working on a new shade altogether. You must get it right.

Here are a few tips that should help you paint your door perfectly and make sure that your efforts are not in vain.

Learn How to Paint

This is basic, but then again, this is where most people go wrong. You must always apply primer first. Ensure the door is completely covered. To make your work easier, get a good roller. Once the primer has dried out, get a paint brush and ensure the trim has been properly done. The brush will also help in fine tuning your work. Let the paint dry properly before you reattach any hardware or fixtures back.

Color Choice

In case you are not sure of what color you can work with, get a few paint chips and tape them on the door. Narrow down your choices and then get sample paint. Compare them side by side and then choose one that gives you the best results. It would be wise to look at the samples during different times of the day so that you know how they look when it’s dim or when the sun is shining bright.

Choice of Paint

You will, in most cases, only need a quart of paint for a single door, especially if it’s properly primed. In case there’s no storm door or glass door between the outdoors and your door, ensure you have exterior paint because this will offer more protection for your door.

For the trim and the door, glossy handyman Little Rock is a brilliant idea. This is because glossy paint highlights the best of your home’s architectural elements, especially when light shines on them at a certain angle.

Glossy paint also withstands scrapes and nicks better than other types of paint, which essentially means that it will serve you well for a very long time. For the best results, make sure you use the right primer for the type of paint you are using.

Preparation

There are two ways of doing handyman Little Rock AR. You can paint it while it’s in place or you can paint the door after removing it from the hinges, especially in the case of storm doors. You would not want bugs to find their way into the house while you try to make the door look good.

Alternatively, carefully tape some tarp over the door opening. You must prime the door before it’s painted, especially if you plan on changing colors. Any fixtures or hardware on the door must be removed and only returned after the paint has dried properly.

Before you plan how to paint your door, make sure you also consider the prevailing weather conditions. You will have good results when you paint the door on a sunny and clear day, especially if the temperatures are normal. This is because the paint will dry properly.